
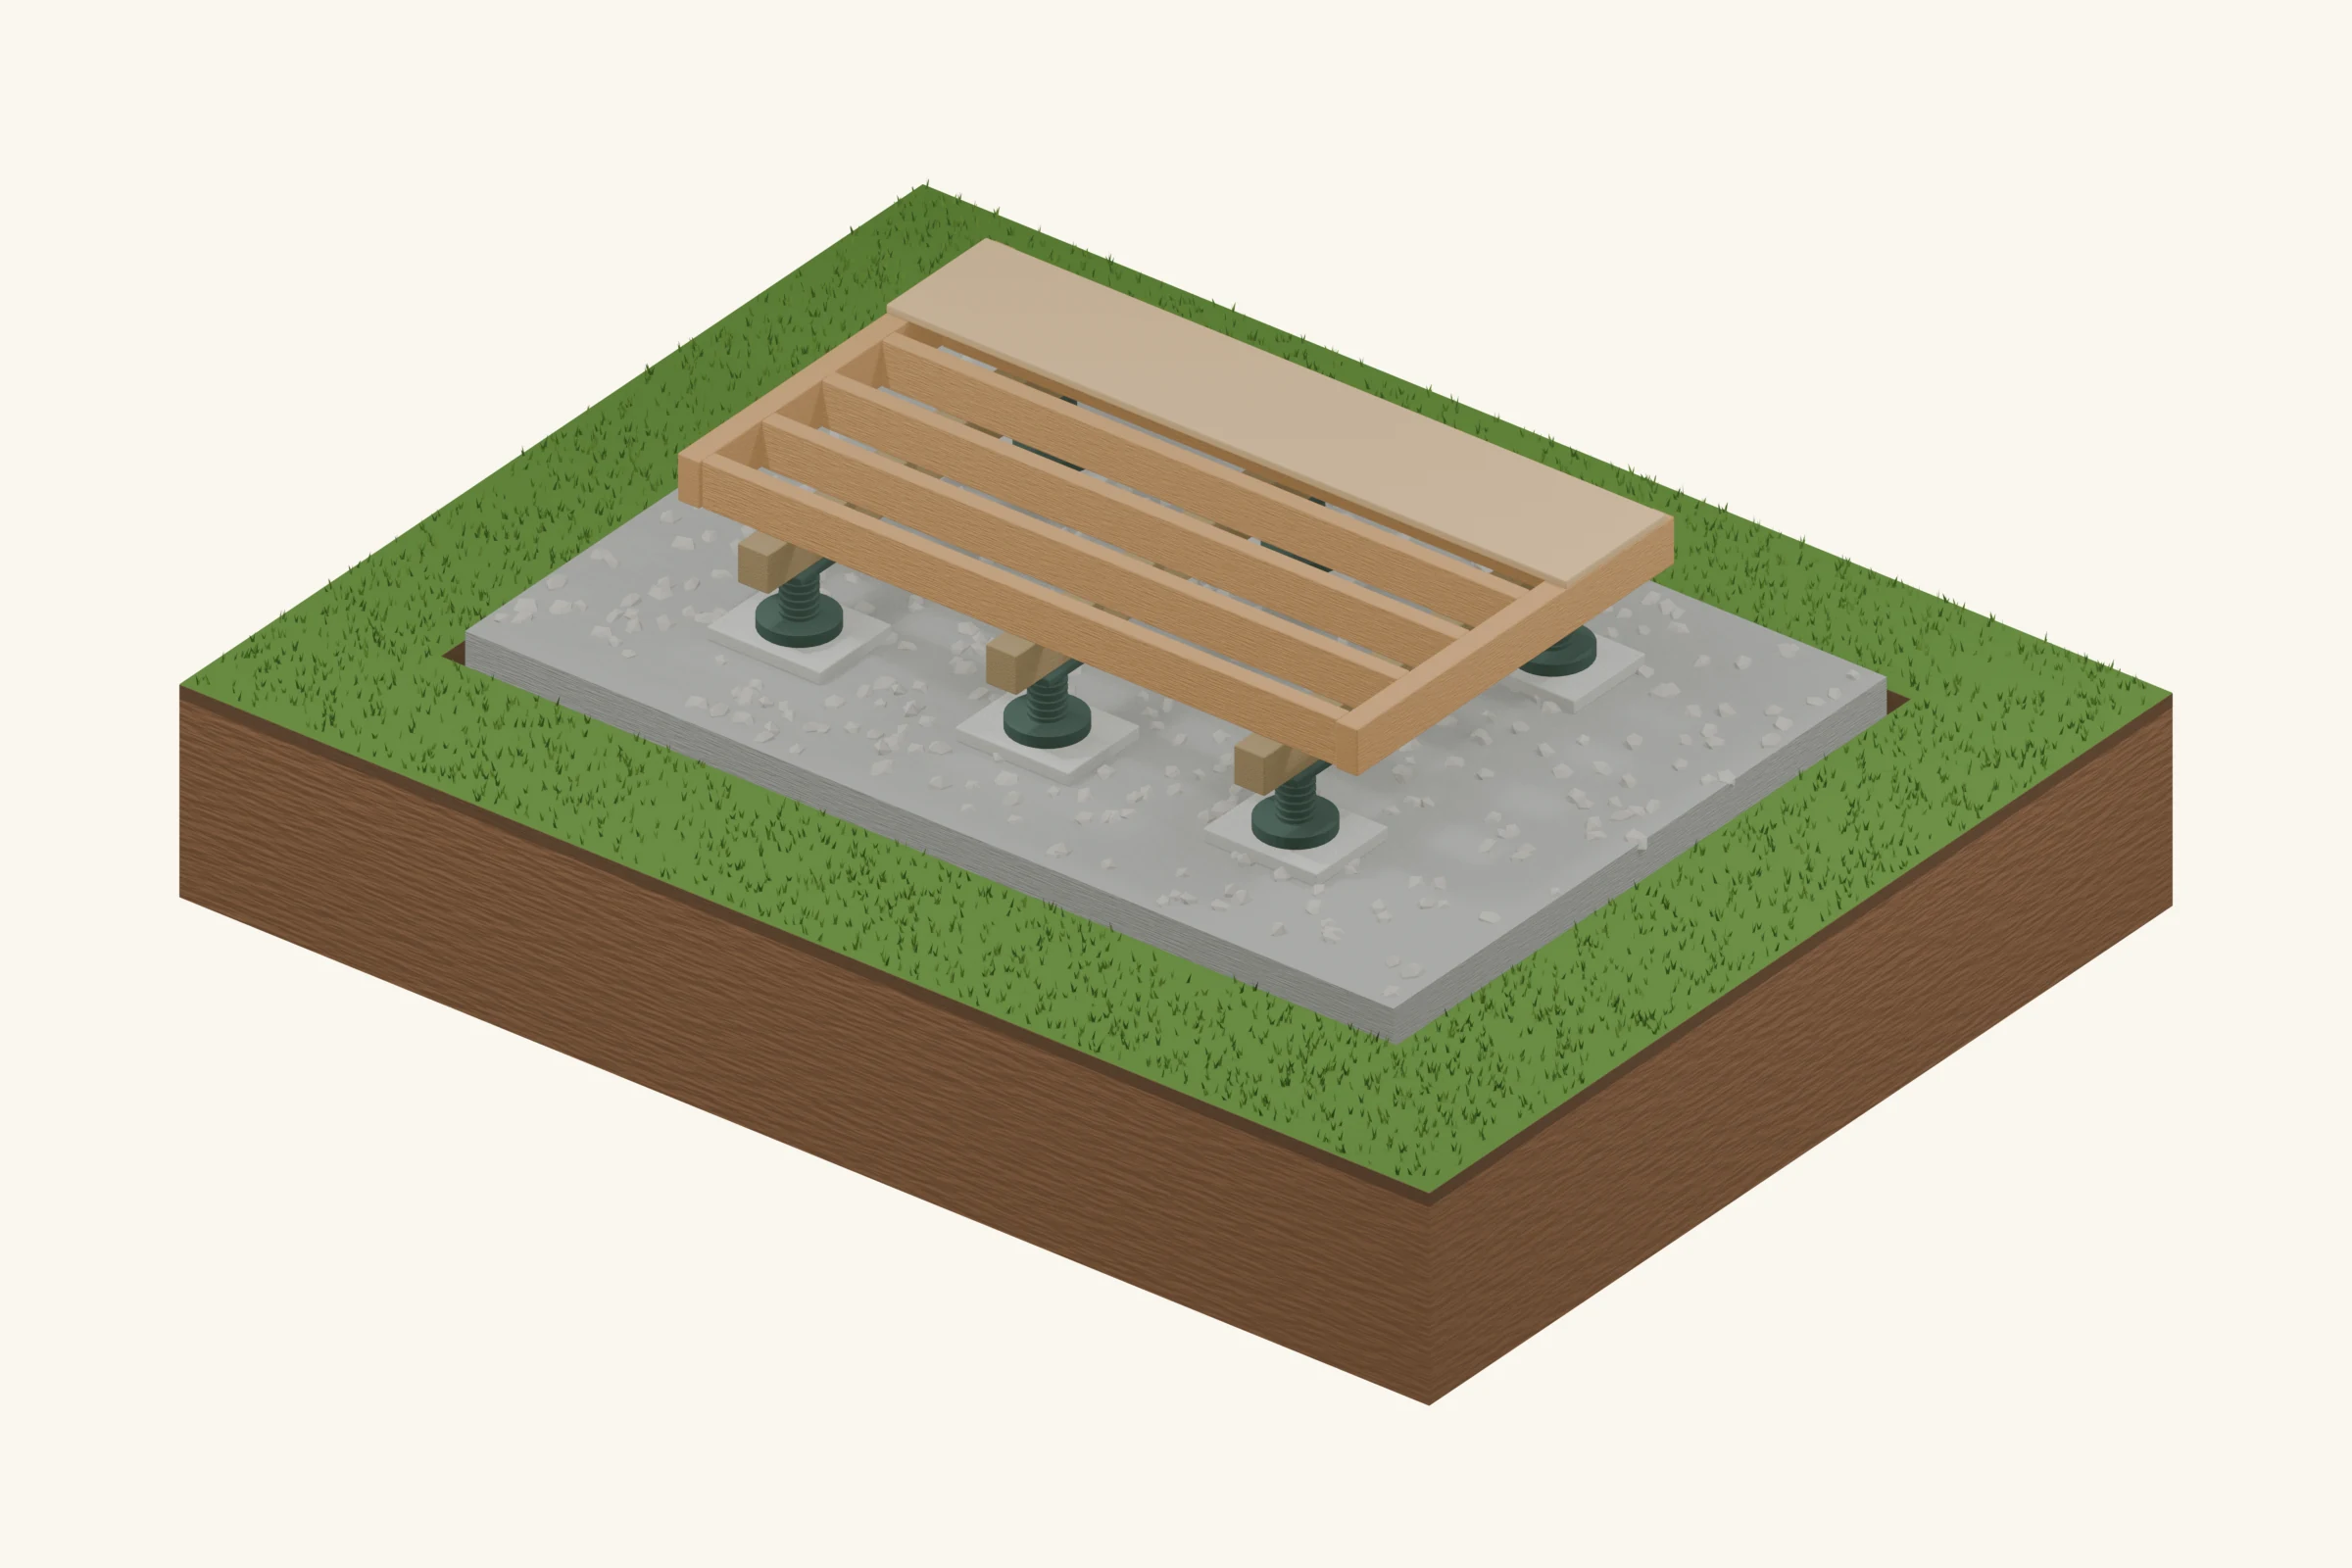
An adjustable pedestal changes height at the support head. It does not correct soft soil, make a slope stable or provide a wind connection automatically. Products sold for roof terraces, paving or decking have different intended uses; choose a system specifically accepted for your shed arrangement. The illustration shows generic pedestals on prepared bearing pads.
Is it right for your shed?
Best fit: A light shed with a compatible frame and a shed-rated pedestal system.
Advantages
- Fine height adjustment can simplify leveling.
- Light components are easy to transport.
- The support head can keep timber above a wet surface.
Limitations
- Load capacity may change with extension and temperature.
- Pedestals need firm bearing and lateral restraint.
- Access is needed for inspection and permitted adjustment.
What goes under it? The ground layers
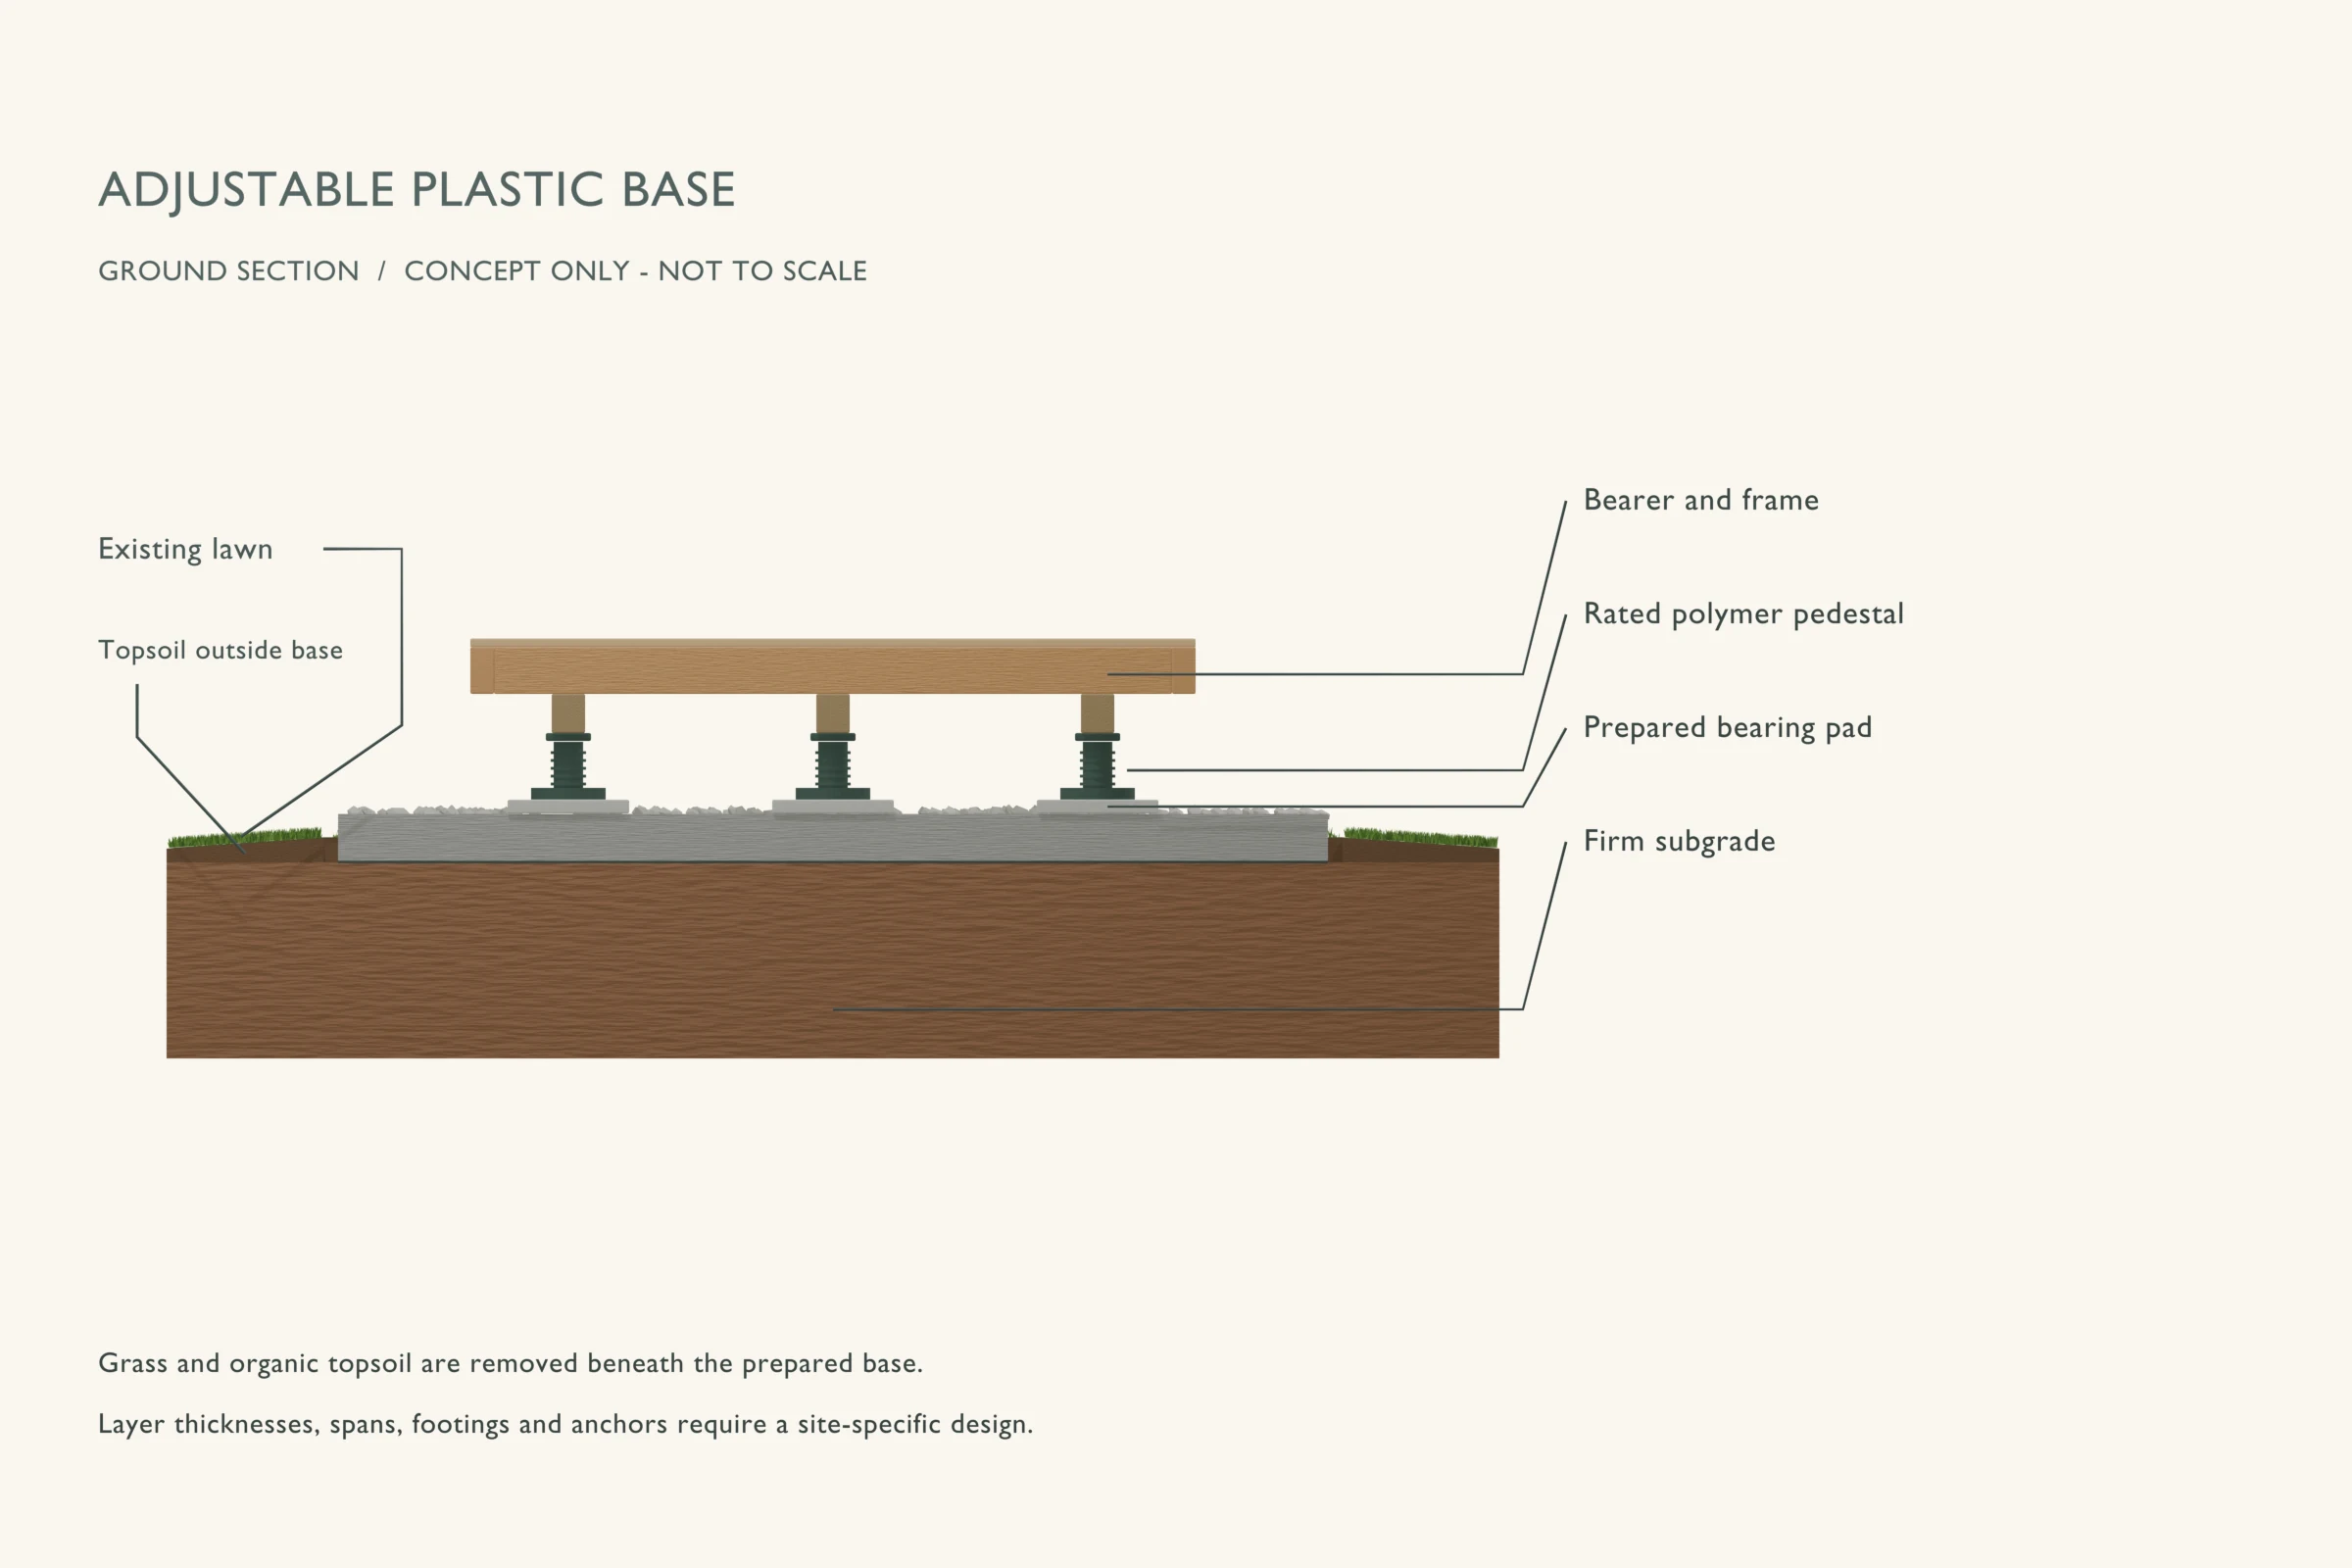
The explanation runs from the ground upward. Callout labels in the drawing identify the visible parts; some thin layers are enlarged for clarity.
- 1
Firm ground
The support surface must be stable and suitable for the pedestal reaction.
- 2
Prepared bearing pad
Use the required base area and material so concentrated loads do not sink.
- 3
Pedestal base
Seat the entire base, using only approved slope-correction components.
- 4
Adjustable stem and head
Keep extension within the product range and secure the prescribed lock.
- 5
Frame and fixings
Connect compatible beams to the head and complete separate bracing and anchorage.
Materials and preparation
Use the quantities and specifications from your actual layout. Before ordering, resolve the pad footprint, support locations, finished floor height and the drainage route.
- Shed-rated pedestals with documented load and height limits
- Specified spreader pads and prepared bearing surface
- Compatible frame, head fixings and wind restraint
Useful planning: choose the shed location and check permit requirements.
Build sequence
This sequence explains the order of work. Use it alongside the foundation design and the instructions for your chosen products.
Step 01
Verify application and reactions
Obtain the product instructions and confirm shed use, support loads, head connections and maximum extension. A decking label alone is not enough.
Step 02
Prepare the bearing locations
Follow the base requirements and mark the frame support pattern. Do not add more pedestals as a substitute for understanding poor soil or an inadequate beam.
Step 03
Set the adjustment range
Start near the planned working height so adjustment remains available within the permitted range. Use approved slope components rather than tilting the base.
Step 04
Connect and level the frame
Adjust unloaded or supported members using the supplier procedure. Check contact at every head, then secure locks and connections. Do not reach beneath an unstable loaded building.
Step 05
Complete wind and movement restraint
Install the required frame bracing and anchors. Keep access to support heads for inspection and cover exposed parts only in ways the manufacturer permits.
Mistakes to avoid
- Using paving pedestals without confirming enclosed-shed suitability.
- Extending a stem beyond its rated range.
- Expecting adjustable heads to stop frost movement.
Inspection and maintenance
Check locks, head contact, cracks and base settlement at the stated service intervals. Relevel only with a safe support procedure. Repeated adjustment is evidence of a ground or load issue that needs correction.
When to choose a different base
Use polymer pedestals when a documented complete system fits the shed. For substantial elevation changes, evaluate designed piers instead of relying on tall adjustable stems.
Common questions
Can I put the feet on soil?
Only if the exact product and support design permit the specified prepared soil and bearing arrangement. Many systems need a hard spreader surface.
Are plastic feet waterproof?
Water resistance of a component does not waterproof the shed floor or protect the ground from movement.
Technical references
Use the currently adopted local requirements and the exact product instructions for your build. These references explain the principles behind this guide.
- ICC: 2024 IRC, Chapter 4 — Foundations
Model-code background for bearing and frost protection. Your adopted code and local amendments control.