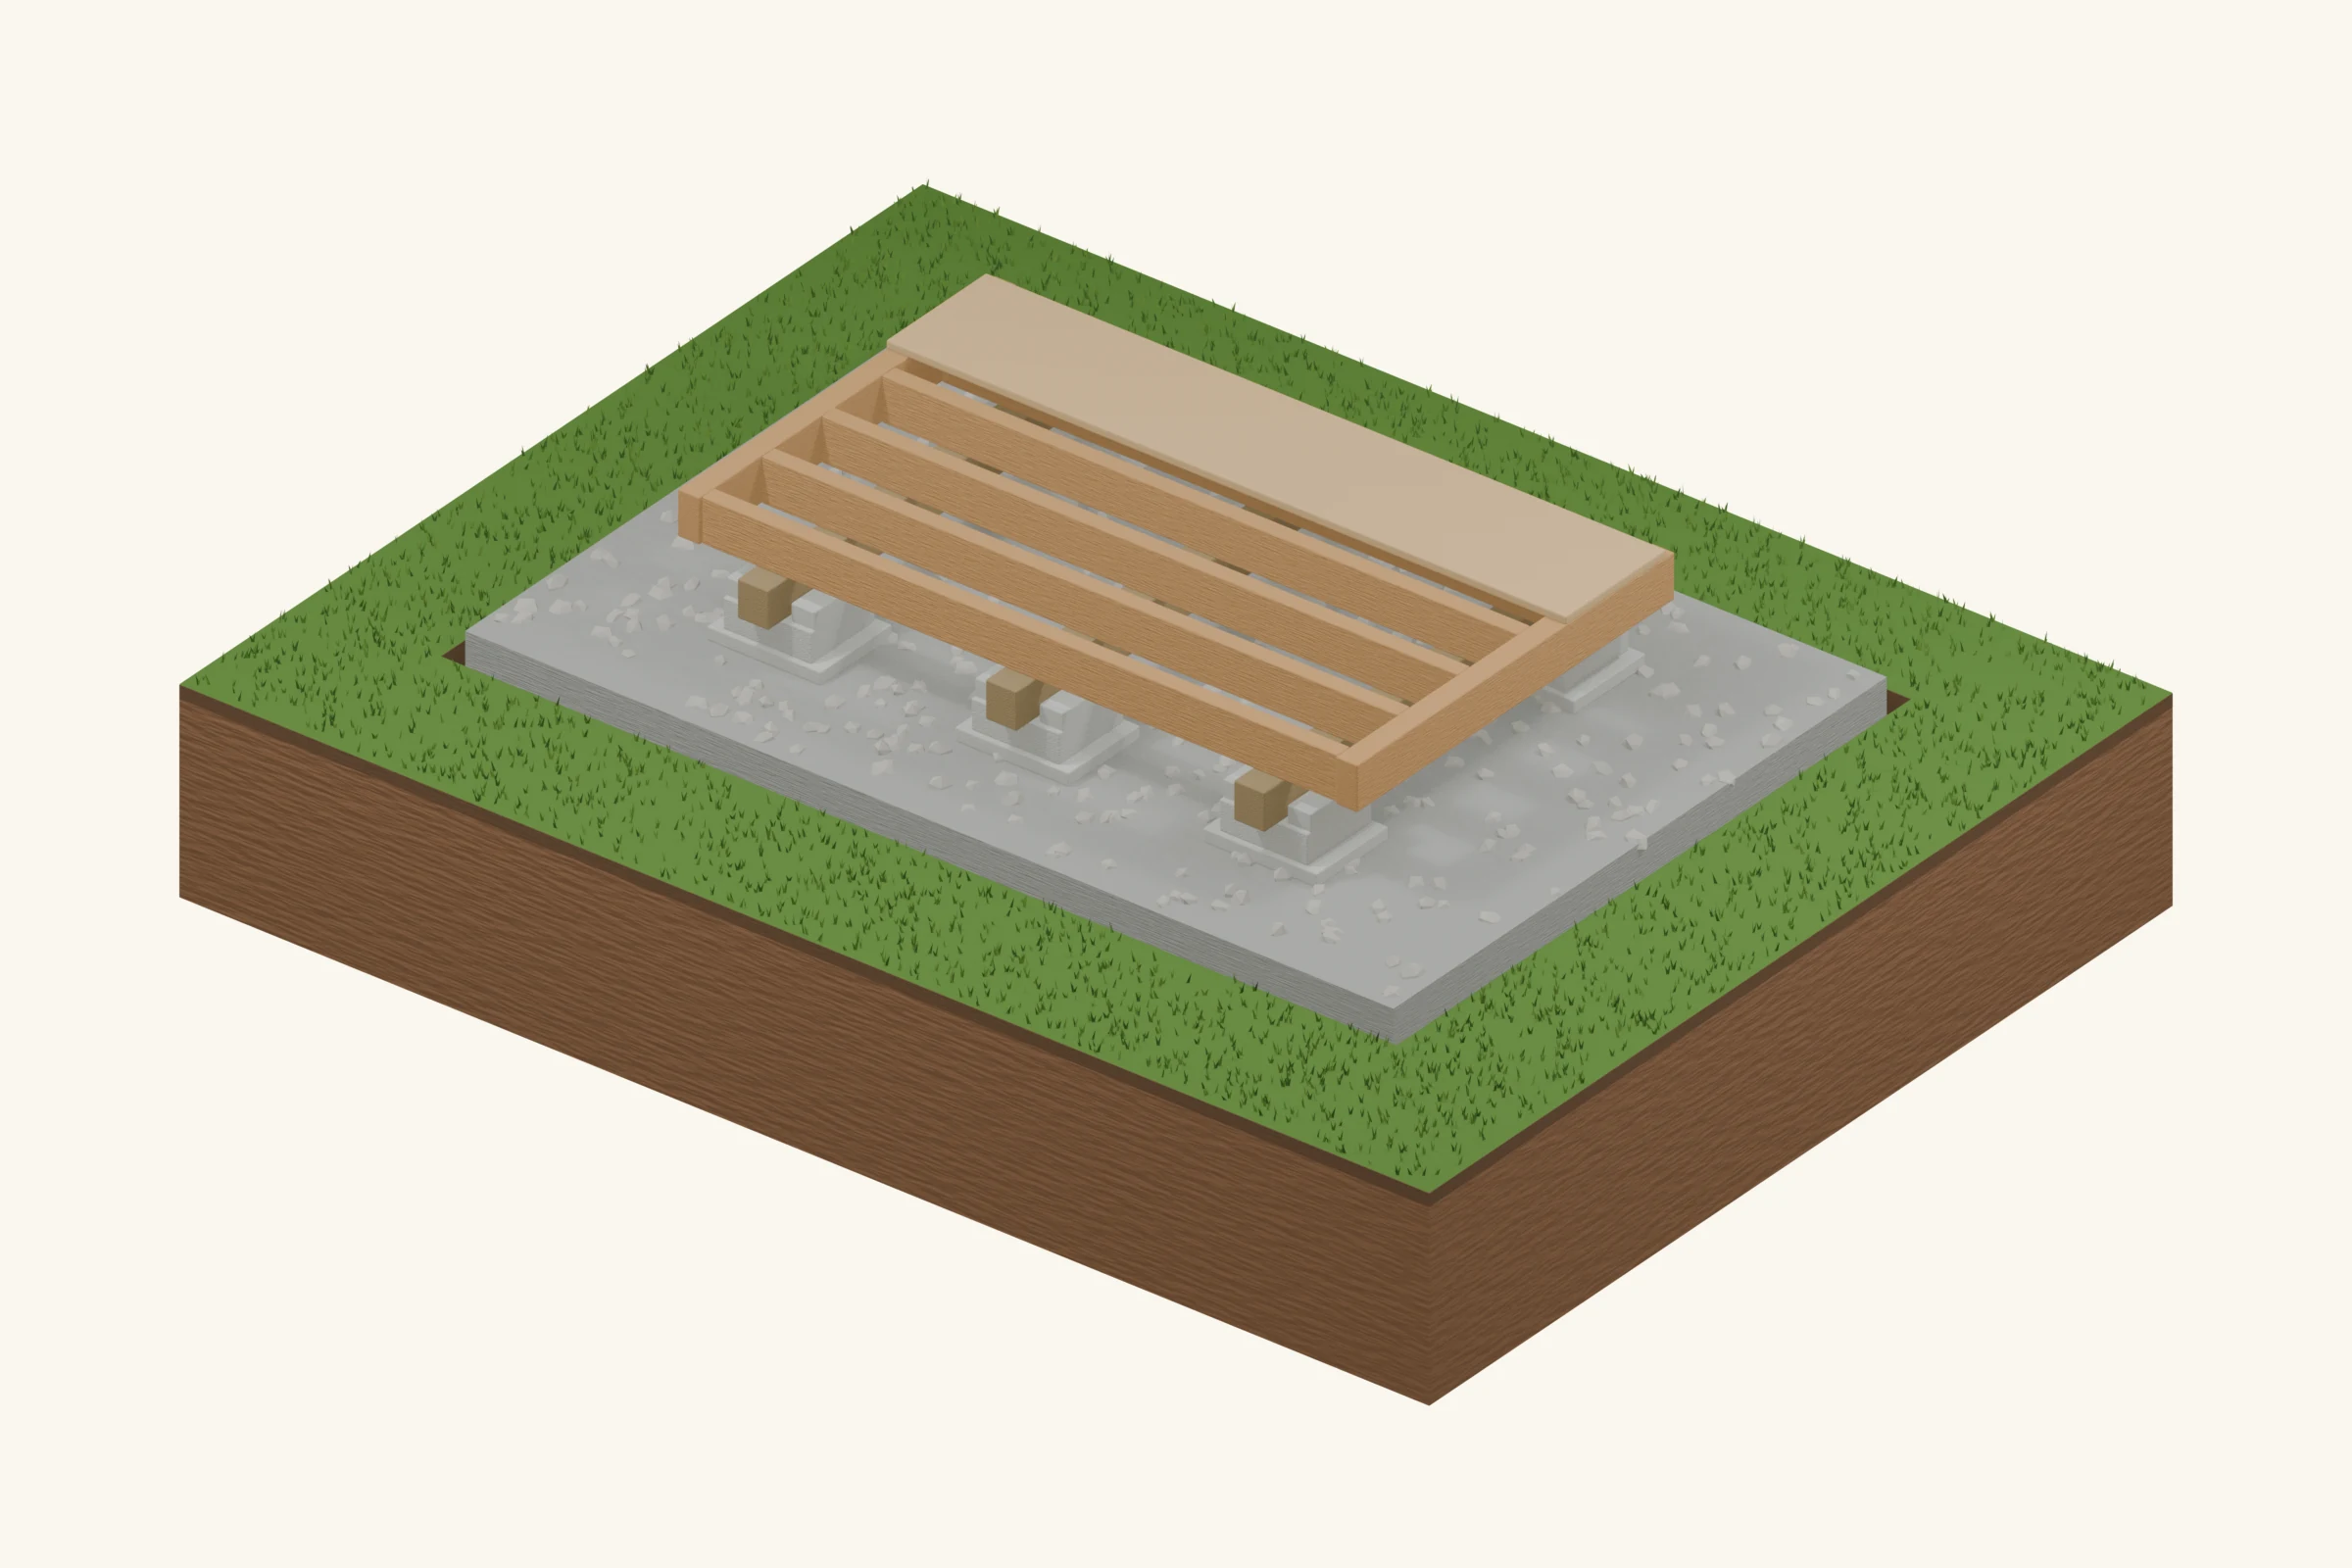
Deck blocks are manufactured support units, not a generic name for any concrete block. Their slots, saddles and permitted member sizes vary. A product suitable for one low deck is not automatically approved for an enclosed shed with different wind and wall loads. Begin with the exact product instructions and the shed floor design.
Is it right for your shed?
Best fit: A low, light timber shed where the selected block system and local rules allow it.
Advantages
- Shaped seats simplify positioning compatible members.
- No on-site concrete placement is needed.
- Individual supports remain accessible beneath a raised floor.
Limitations
- Bearing pads can settle differently.
- Seat dimensions and allowable use vary by product.
- Tall posts introduce bracing and overturning concerns.
What goes under it? The ground layers
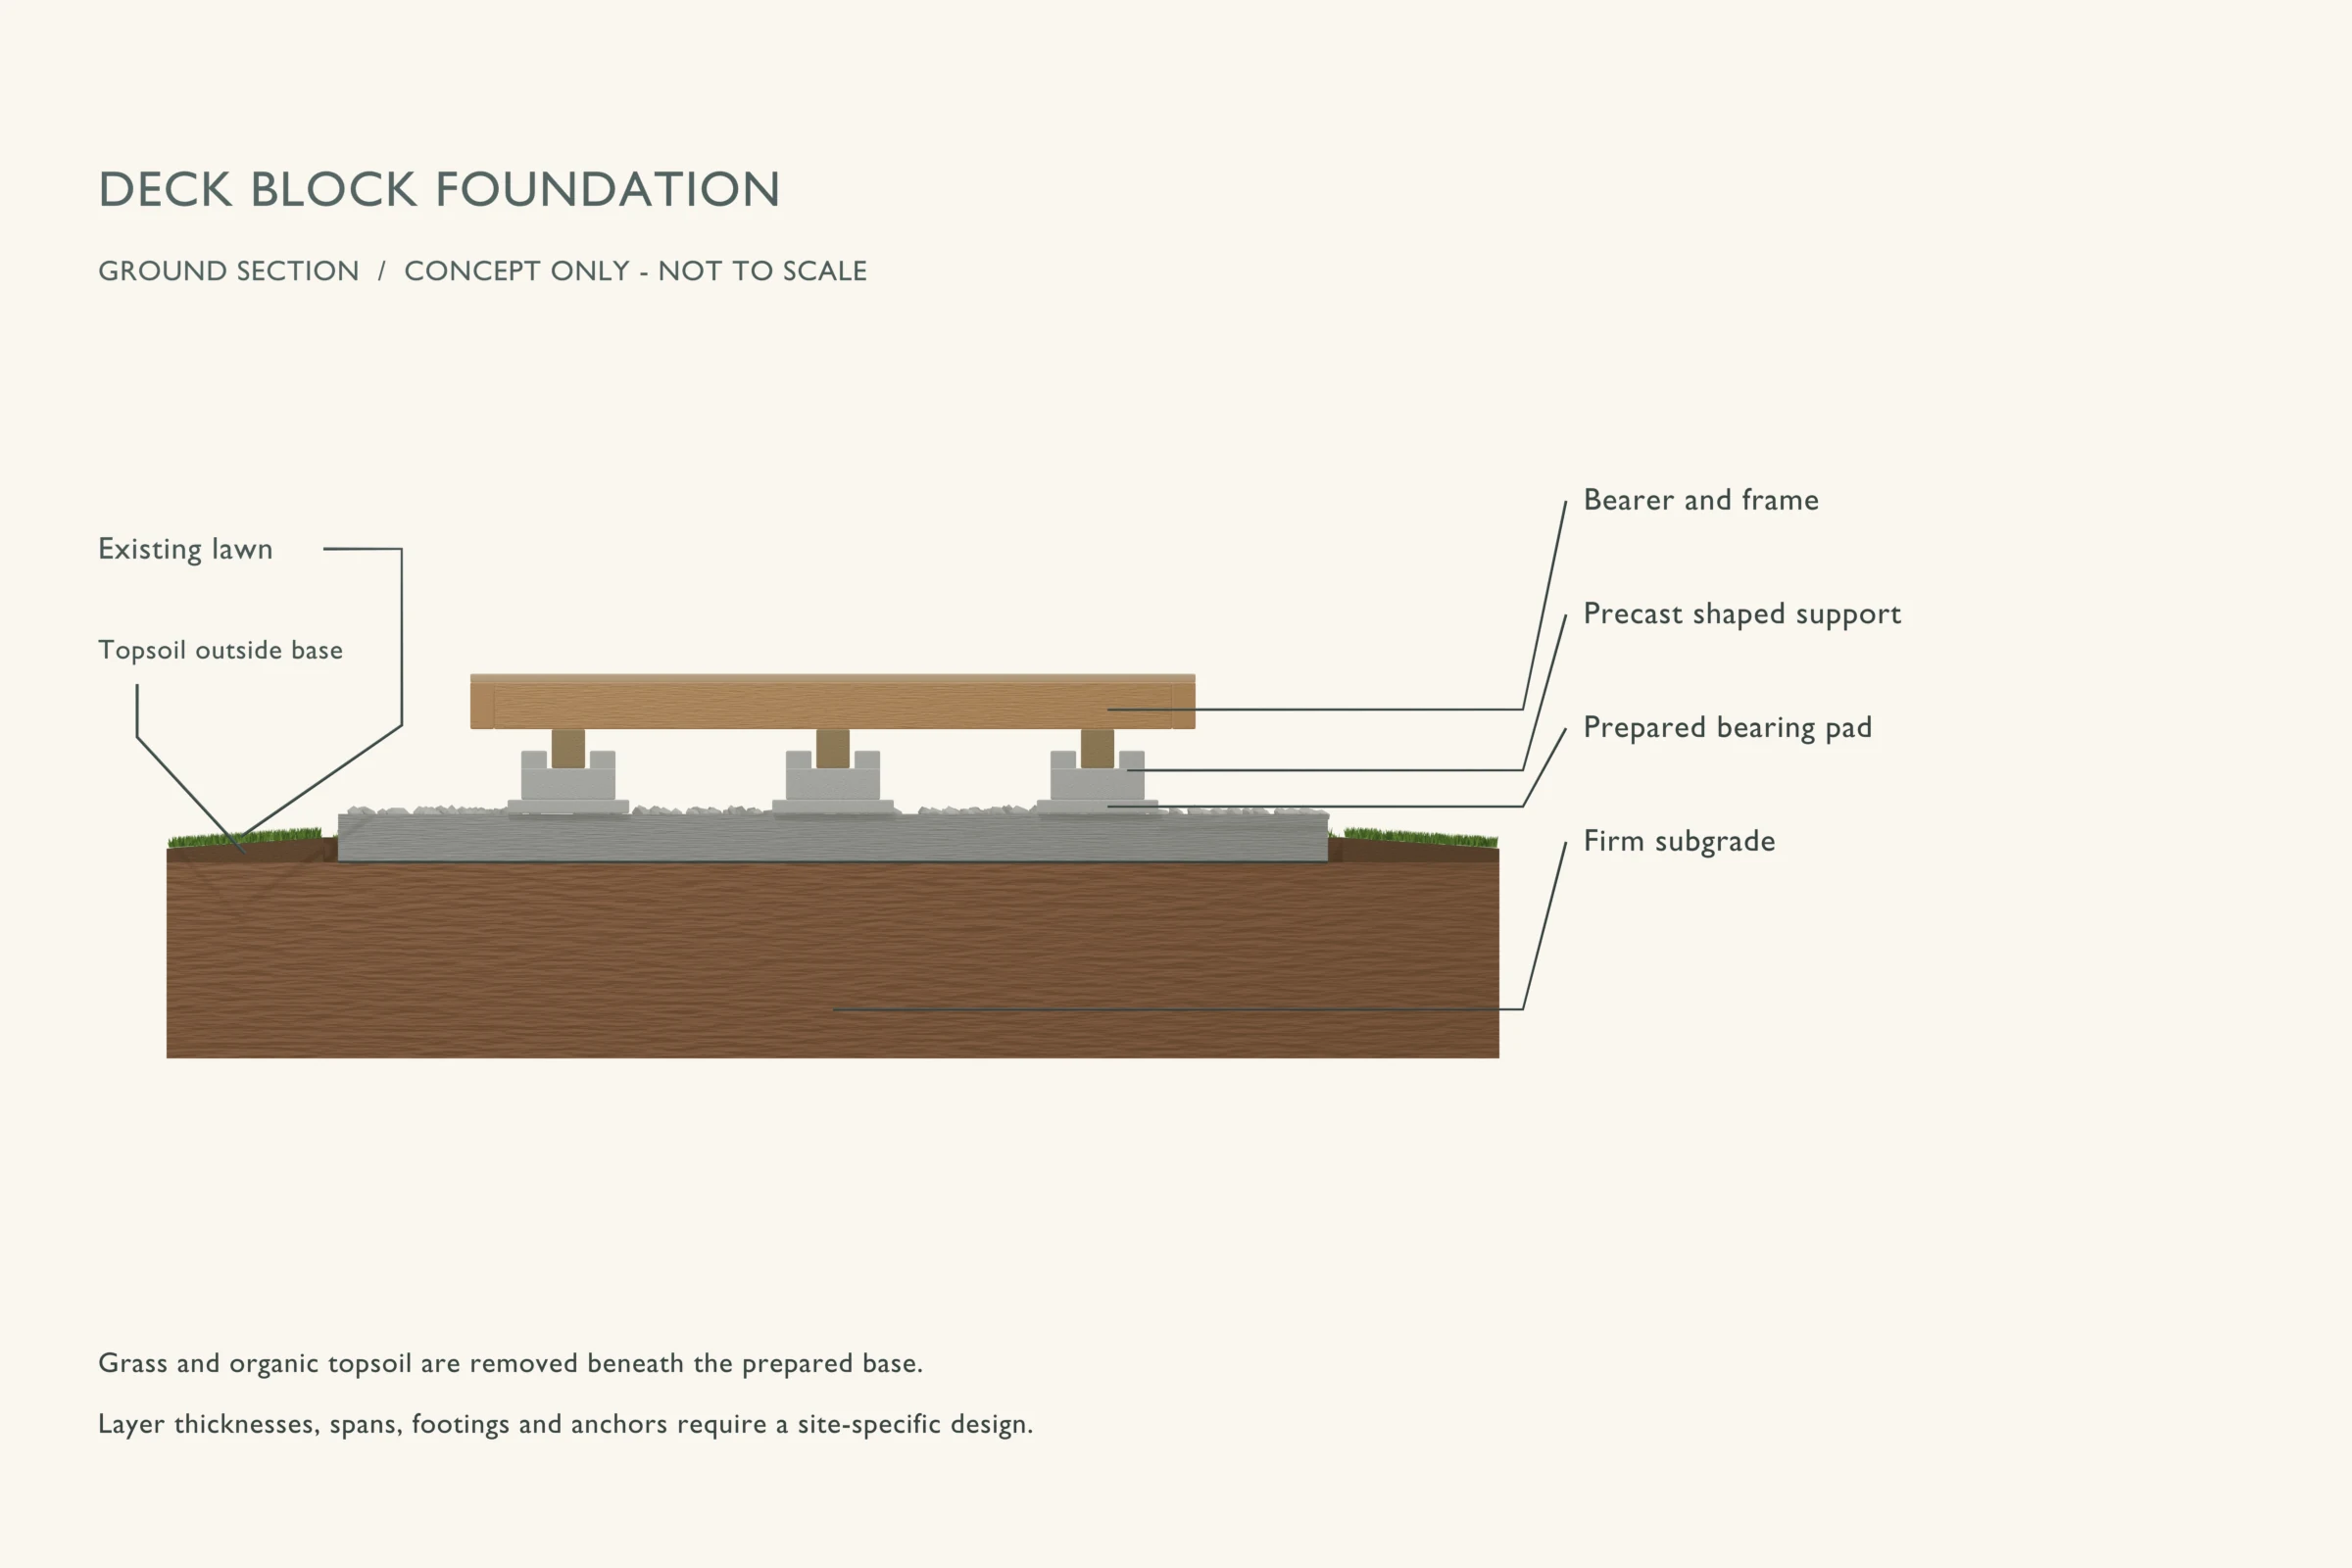
The explanation runs from the ground upward. Callout labels in the drawing identify the visible parts; some thin layers are enlarged for clarity.
- 1
Firm subgrade
Strip organics and correct weak material at each support.
- 2
Compacted pad
Prepare the specified bearing area; do not rely on a small loose gravel mound.
- 3
Precast deck block
Set level with full underside contact and the seat in the correct direction.
- 4
Compatible bearer
Use the intended beam or post size and connection detail.
- 5
Floor framing
Connect the floor to the supports and complete wind restraint.
Materials and preparation
Use the quantities and specifications from your actual layout. Before ordering, resolve the pad footprint, support locations, finished floor height and the drainage route.
- Approved precast deck blocks and compatible members
- Specified granular pads and any separation layer
- Floor connectors and a separate anchorage design
Useful planning: choose the shed location and check permit requirements.
Build sequence
This sequence explains the order of work. Use it alongside the foundation design and the instructions for your chosen products.
Step 01
Check the product use
Read the block instructions for shed suitability, member sizes, loads and height limits. Coordinate those limits with the floor support reactions and local requirements.
Step 02
Mark the actual support locations
Place supports under designed beam lines. Keep the layout square and use a common top-of-support datum; equal spacing is not proof of adequate beam spans.
Step 03
Prepare and seat each block
Excavate organics, prepare the pad and compact it. Set the block without rocking and check the saddle direction before placing timber.
Step 04
Install the frame and restraint
Use the specified members and connectors. Keep any posts within the designed exposed height and add the required bracing. A saddle holding wood by gravity is not a wind anchor.
Step 05
Verify before closing the floor
Check bearing contact, levels, diagonals and anchorage while they are visible. Fix low pads at the base rather than packing the seat with improvised scraps.
Mistakes to avoid
- Confusing a deck-block seat with a rated uplift connection.
- Using tall unbraced posts to compensate for a slope.
- Mixing support products with incompatible heights and capacities.
Inspection and maintenance
Check blocks for cracking, tilt and sinking after wet weather. Keep the timber seat clear of trapped debris. If a pad moves repeatedly, investigate the underlying soil and water path.
When to choose a different base
Choose deck blocks only when the complete support arrangement is appropriate. Solid blocks have a simpler flat bearing surface, while piers offer a different route for frost and slope requirements.
Common questions
Can deck blocks sit on pavers?
Only if the support design and product instructions permit the complete stack. A thin paver may not be suitable under a concentrated block reaction.
Do deck blocks need anchors?
The shed needs a continuous uplift and lateral load path. Whether the block participates in it depends on the product; separate anchors are often a separate design item.
Technical references
Use the currently adopted local requirements and the exact product instructions for your build. These references explain the principles behind this guide.
- ICC: 2024 IRC, Chapter 4 — Foundations
Model-code background for bearing and frost protection. Your adopted code and local amendments control.
- AWPA: treated wood guidance for homeowners
Use-category labels distinguish above-ground, ground-contact and more demanding exposures.