
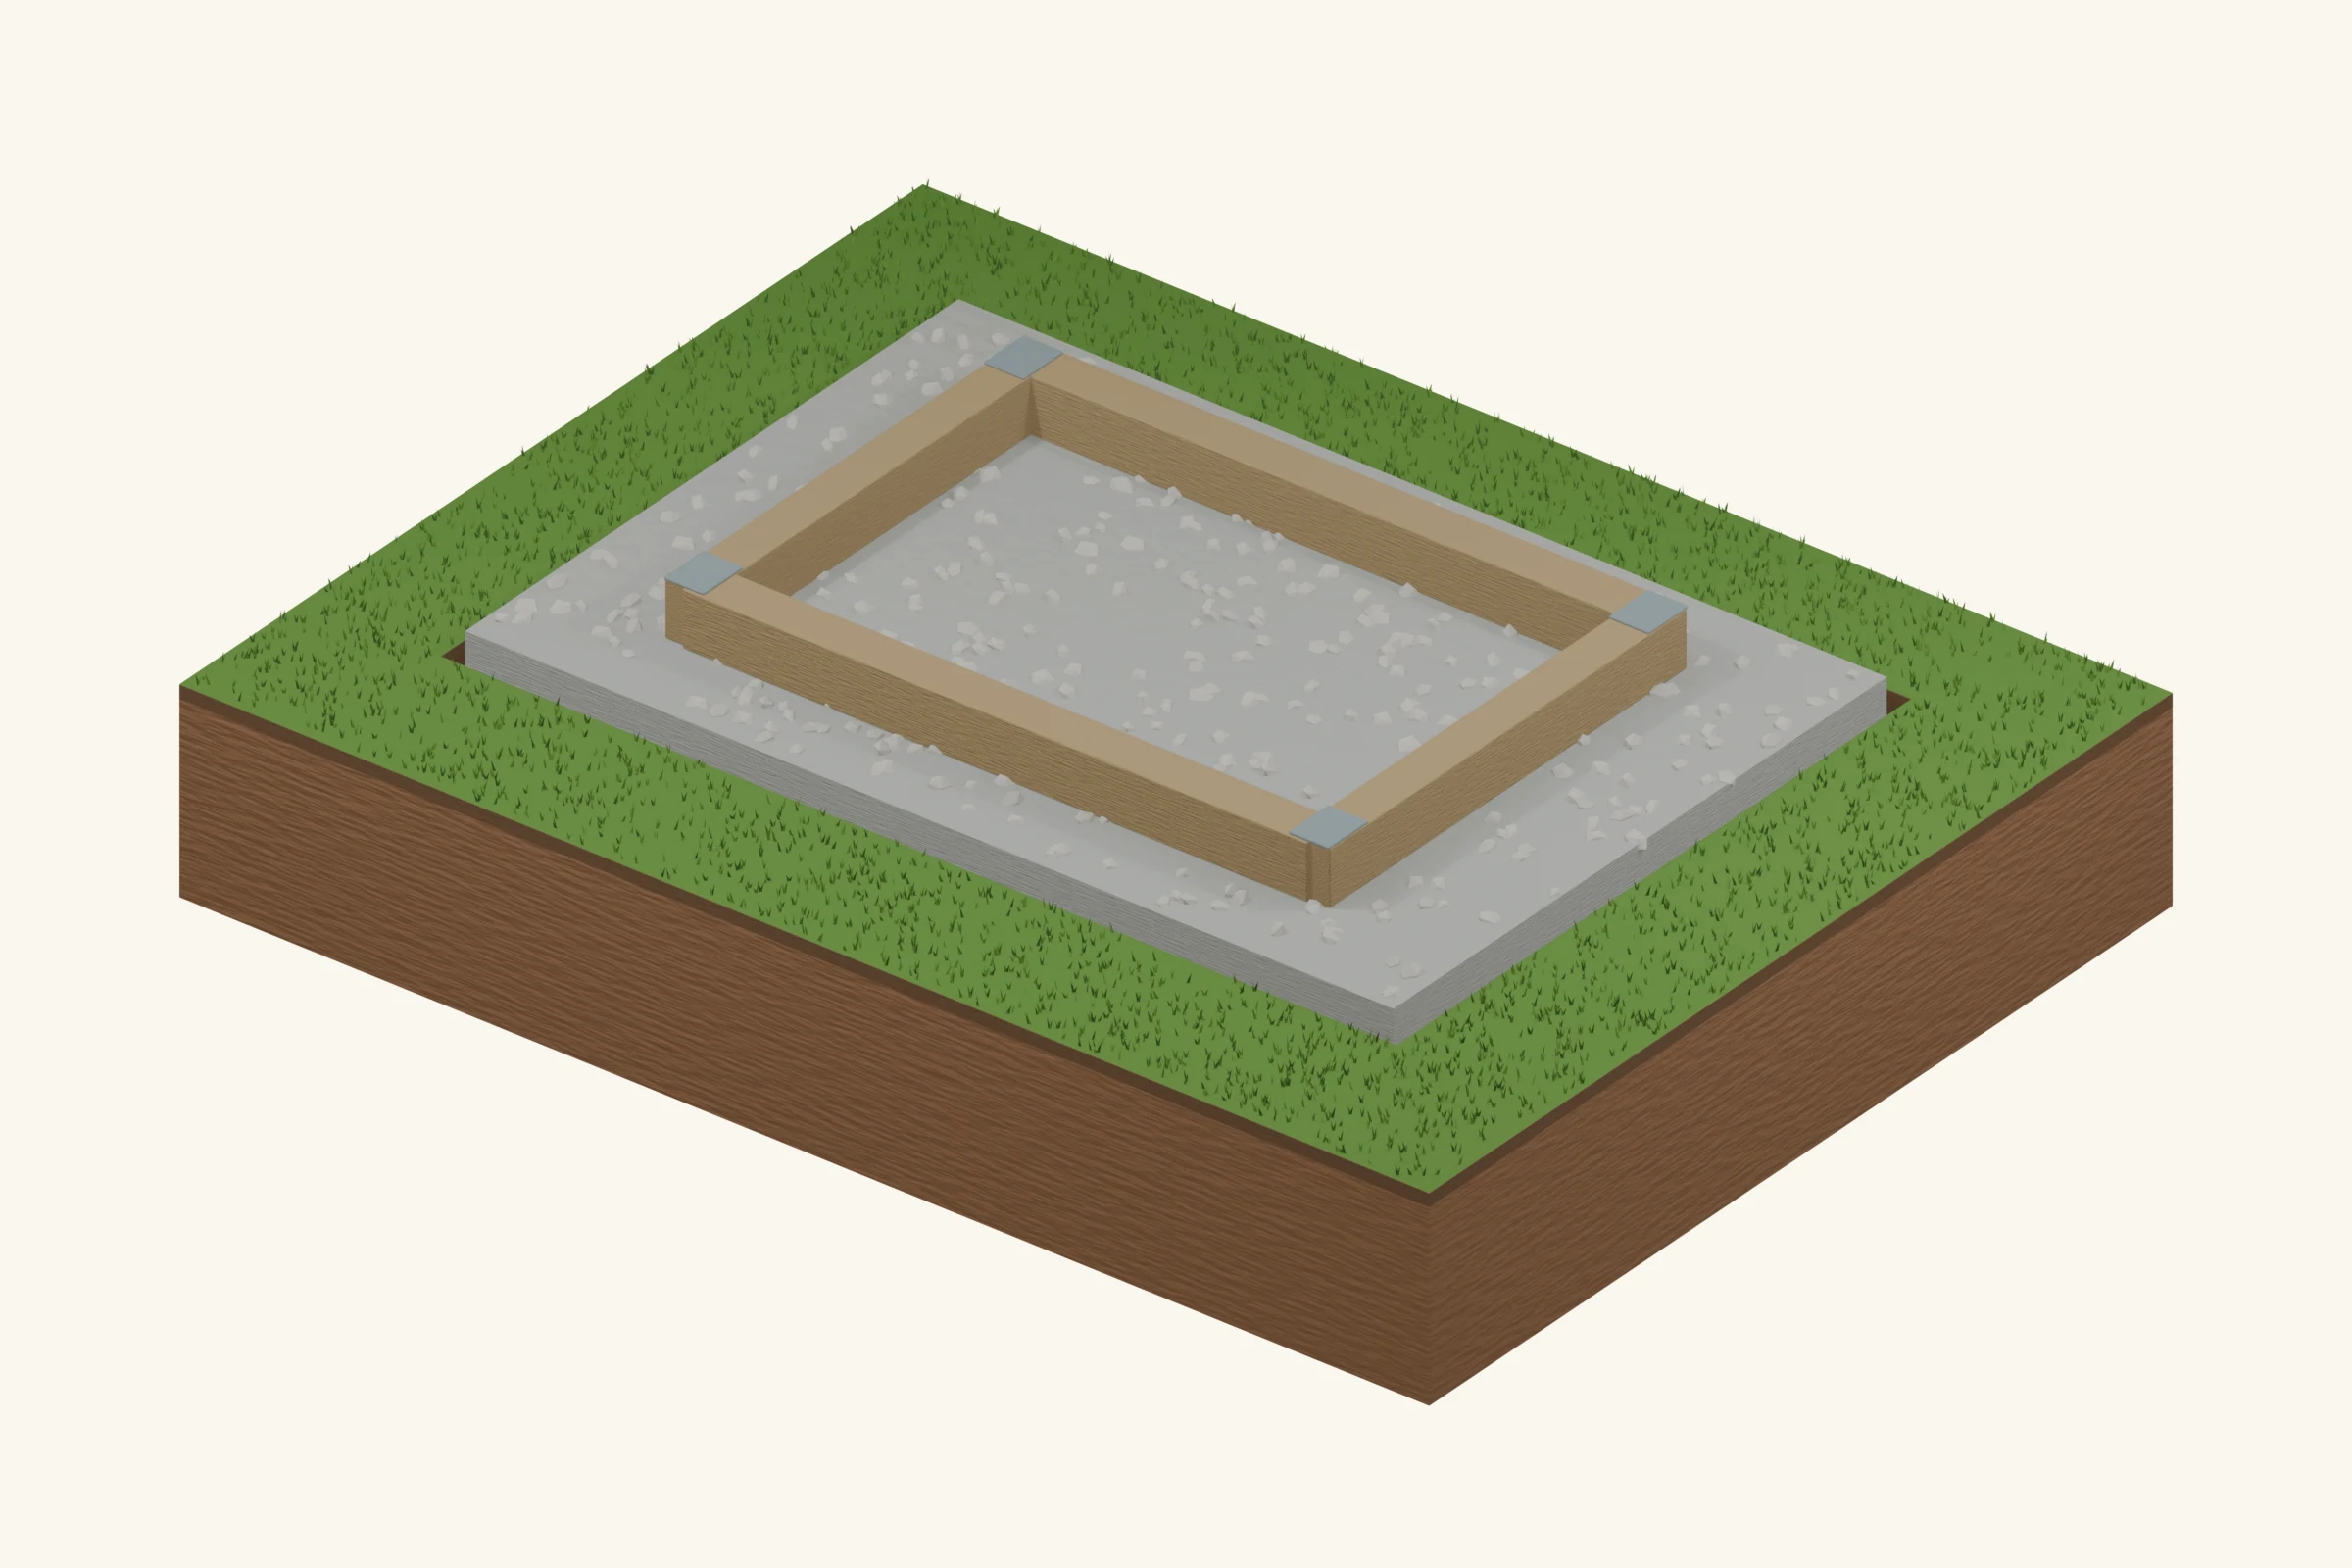
Here, timber frame means a foundation perimeter made from substantial treated members, not the timber framing of the shed walls. It must be distinguished from a decorative gravel border. A structural perimeter carries building loads, needs real corner connections and bearing, and may include an independently designed floor within it. Loose infill does not make unsupported timber capable of spanning.
Is it right for your shed?
Best fit: A small building explicitly designed around a low structural perimeter base.
Advantages
- A clear perimeter makes layout straightforward.
- Can accommodate an open aggregate interior or a compatible floor design.
- Timber components can be cut with common carpentry tools.
Limitations
- Ground exposure makes treatment selection important.
- Corner joints and wall anchorage require design.
- A low border cannot retain a deep hillside fill.
What goes under it? The ground layers
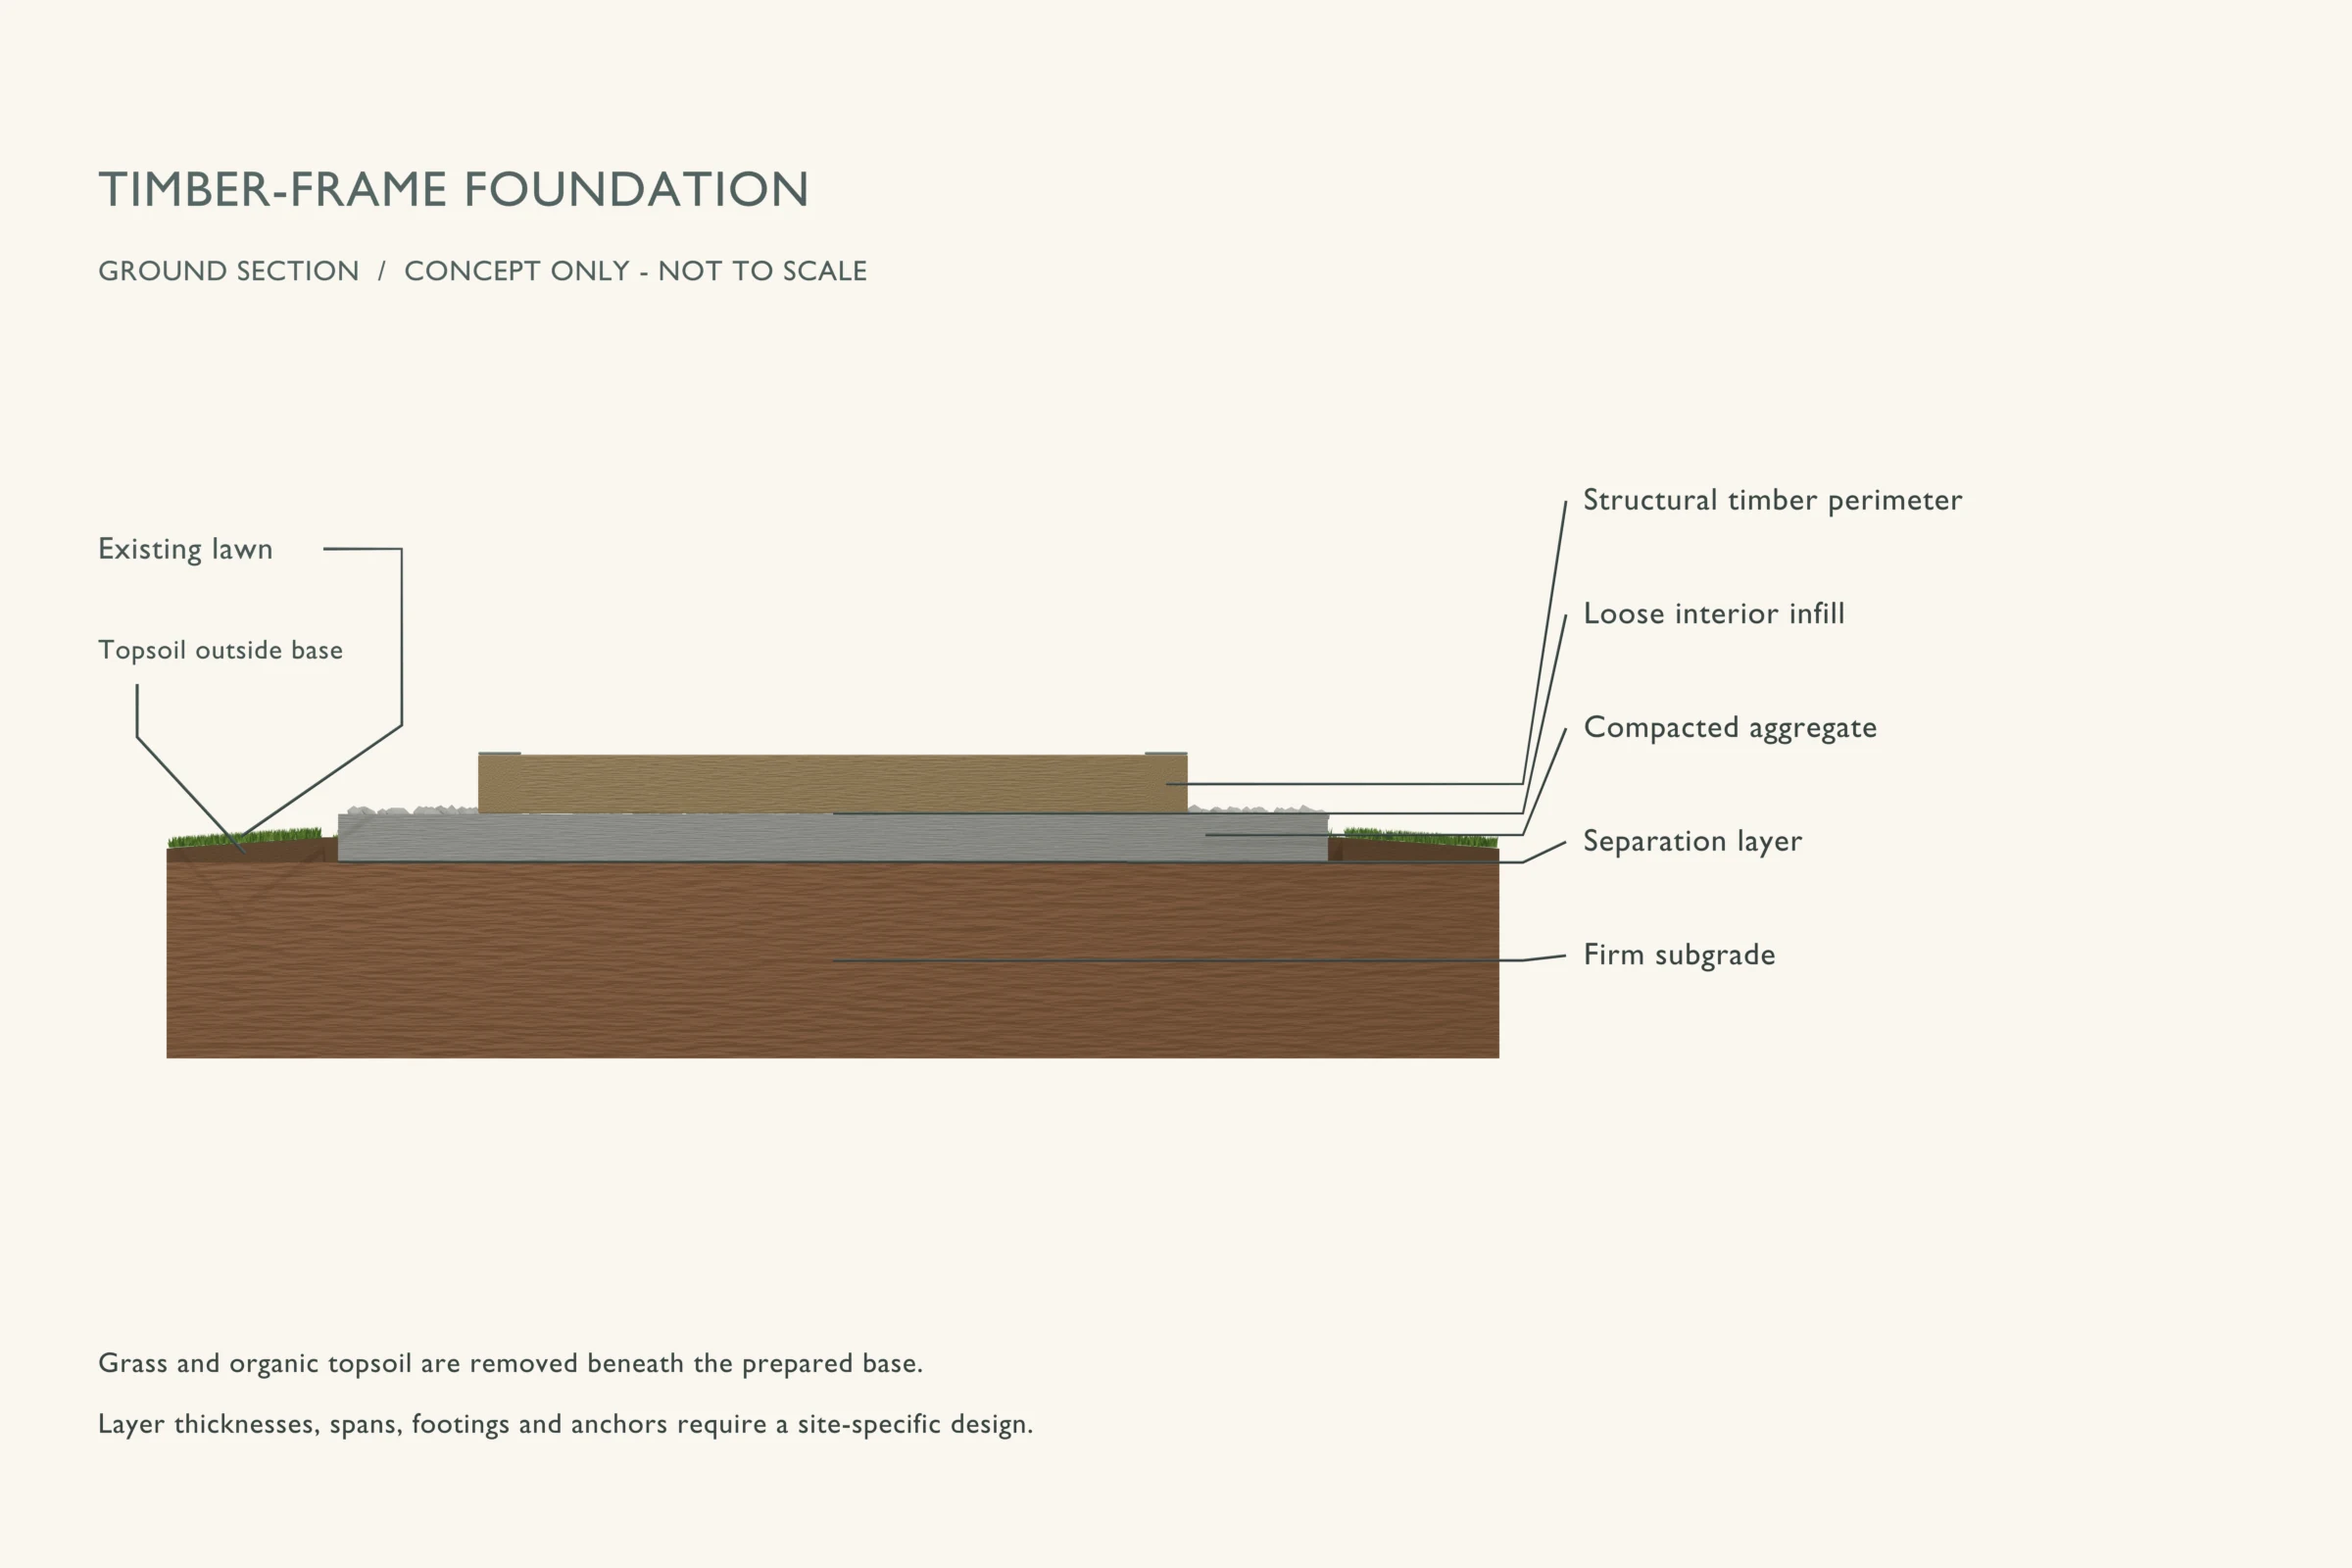
The explanation runs from the ground upward. Callout labels in the drawing identify the visible parts; some thin layers are enlarged for clarity.
- 1
Firm soil
Provide uniform support beneath the whole structural perimeter.
- 2
Prepared aggregate
Level and compact the specified granular bearing layer.
- 3
Structural timber perimeter
Connect corners using the design detail and support members over their required bearing length.
- 4
Interior infill
Gravel or paving is a finish within the frame; it does not replace wall support.
- 5
Wall or floor connection
Transfer loads into the perimeter with a defined connection and moisture detail.
Materials and preparation
Use the quantities and specifications from your actual layout. Before ordering, resolve the pad footprint, support locations, finished floor height and the drainage route.
- Specified structural ground-contact timbers
- Compatible corner hardware and wall anchors
- Prepared aggregate bearing and chosen interior finish
Useful planning: choose the shed location and check permit requirements.
Build sequence
This sequence explains the order of work. Use it alongside the foundation design and the instructions for your chosen products.
Step 01
Choose the intended load arrangement
Decide whether the walls sit directly on the perimeter or a framed floor distributes loads into it. The answer determines member size, joints and internal support; it cannot be decided after filling the rectangle.
Step 02
Prepare perimeter bearing
Remove organic ground and establish the granular layer. Check every corner and long side. A straight timber spanning a low spot requires a different calculation from a continuously supported one.
Step 03
Cut and connect the frame
Lay out opposing sides, check diagonals and form only the joints specified in the design. A half-lap removes section from both members; its dimensions and fastening are structural choices.
Step 04
Install the interior system
Place the selected aggregate, pavers or floor framing. Keep wall bearing separate from a floating interior finish. If installing joists, use the support and connection details for the actual joist spans.
Step 05
Manage water and attach the shed
Keep untreated wall parts clear of wet surfaces, fit the specified moisture break and anchors, and grade outside the timber so runoff does not collect against it.
Mistakes to avoid
- Using thin landscape edging as a wall foundation.
- Assuming gravel infill braces the building against wind.
- Stacking timbers to retain a slope without a wall design.
Inspection and maintenance
Look for opened corners, loose fasteners, soft timber and ponding along the outside face. Keep the timber visible enough to inspect and preserve the planned clearance between exterior cladding and the ground.
When to choose a different base
Use this system when it is part of the building design. For a conventional prefabricated timber floor, skids are often easier to coordinate; for a clean solid floor, consider paving or a properly designed slab.
Common questions
Is a timber gravel border a foundation?
Only when it is designed to support the building. A border whose sole job is retaining loose stone should not receive wall loads.
Can the inside be filled with concrete?
A concrete floor needs its own base, moisture, joint and movement details. Do not assume pouring against the timber creates a designed slab foundation.
Technical references
Use the currently adopted local requirements and the exact product instructions for your build. These references explain the principles behind this guide.
- AWPA: treated wood guidance for homeowners
Use-category labels distinguish above-ground, ground-contact and more demanding exposures.
- ICC: 2024 IRC, Chapter 4 — Foundations
Model-code background for bearing and frost protection. Your adopted code and local amendments control.