
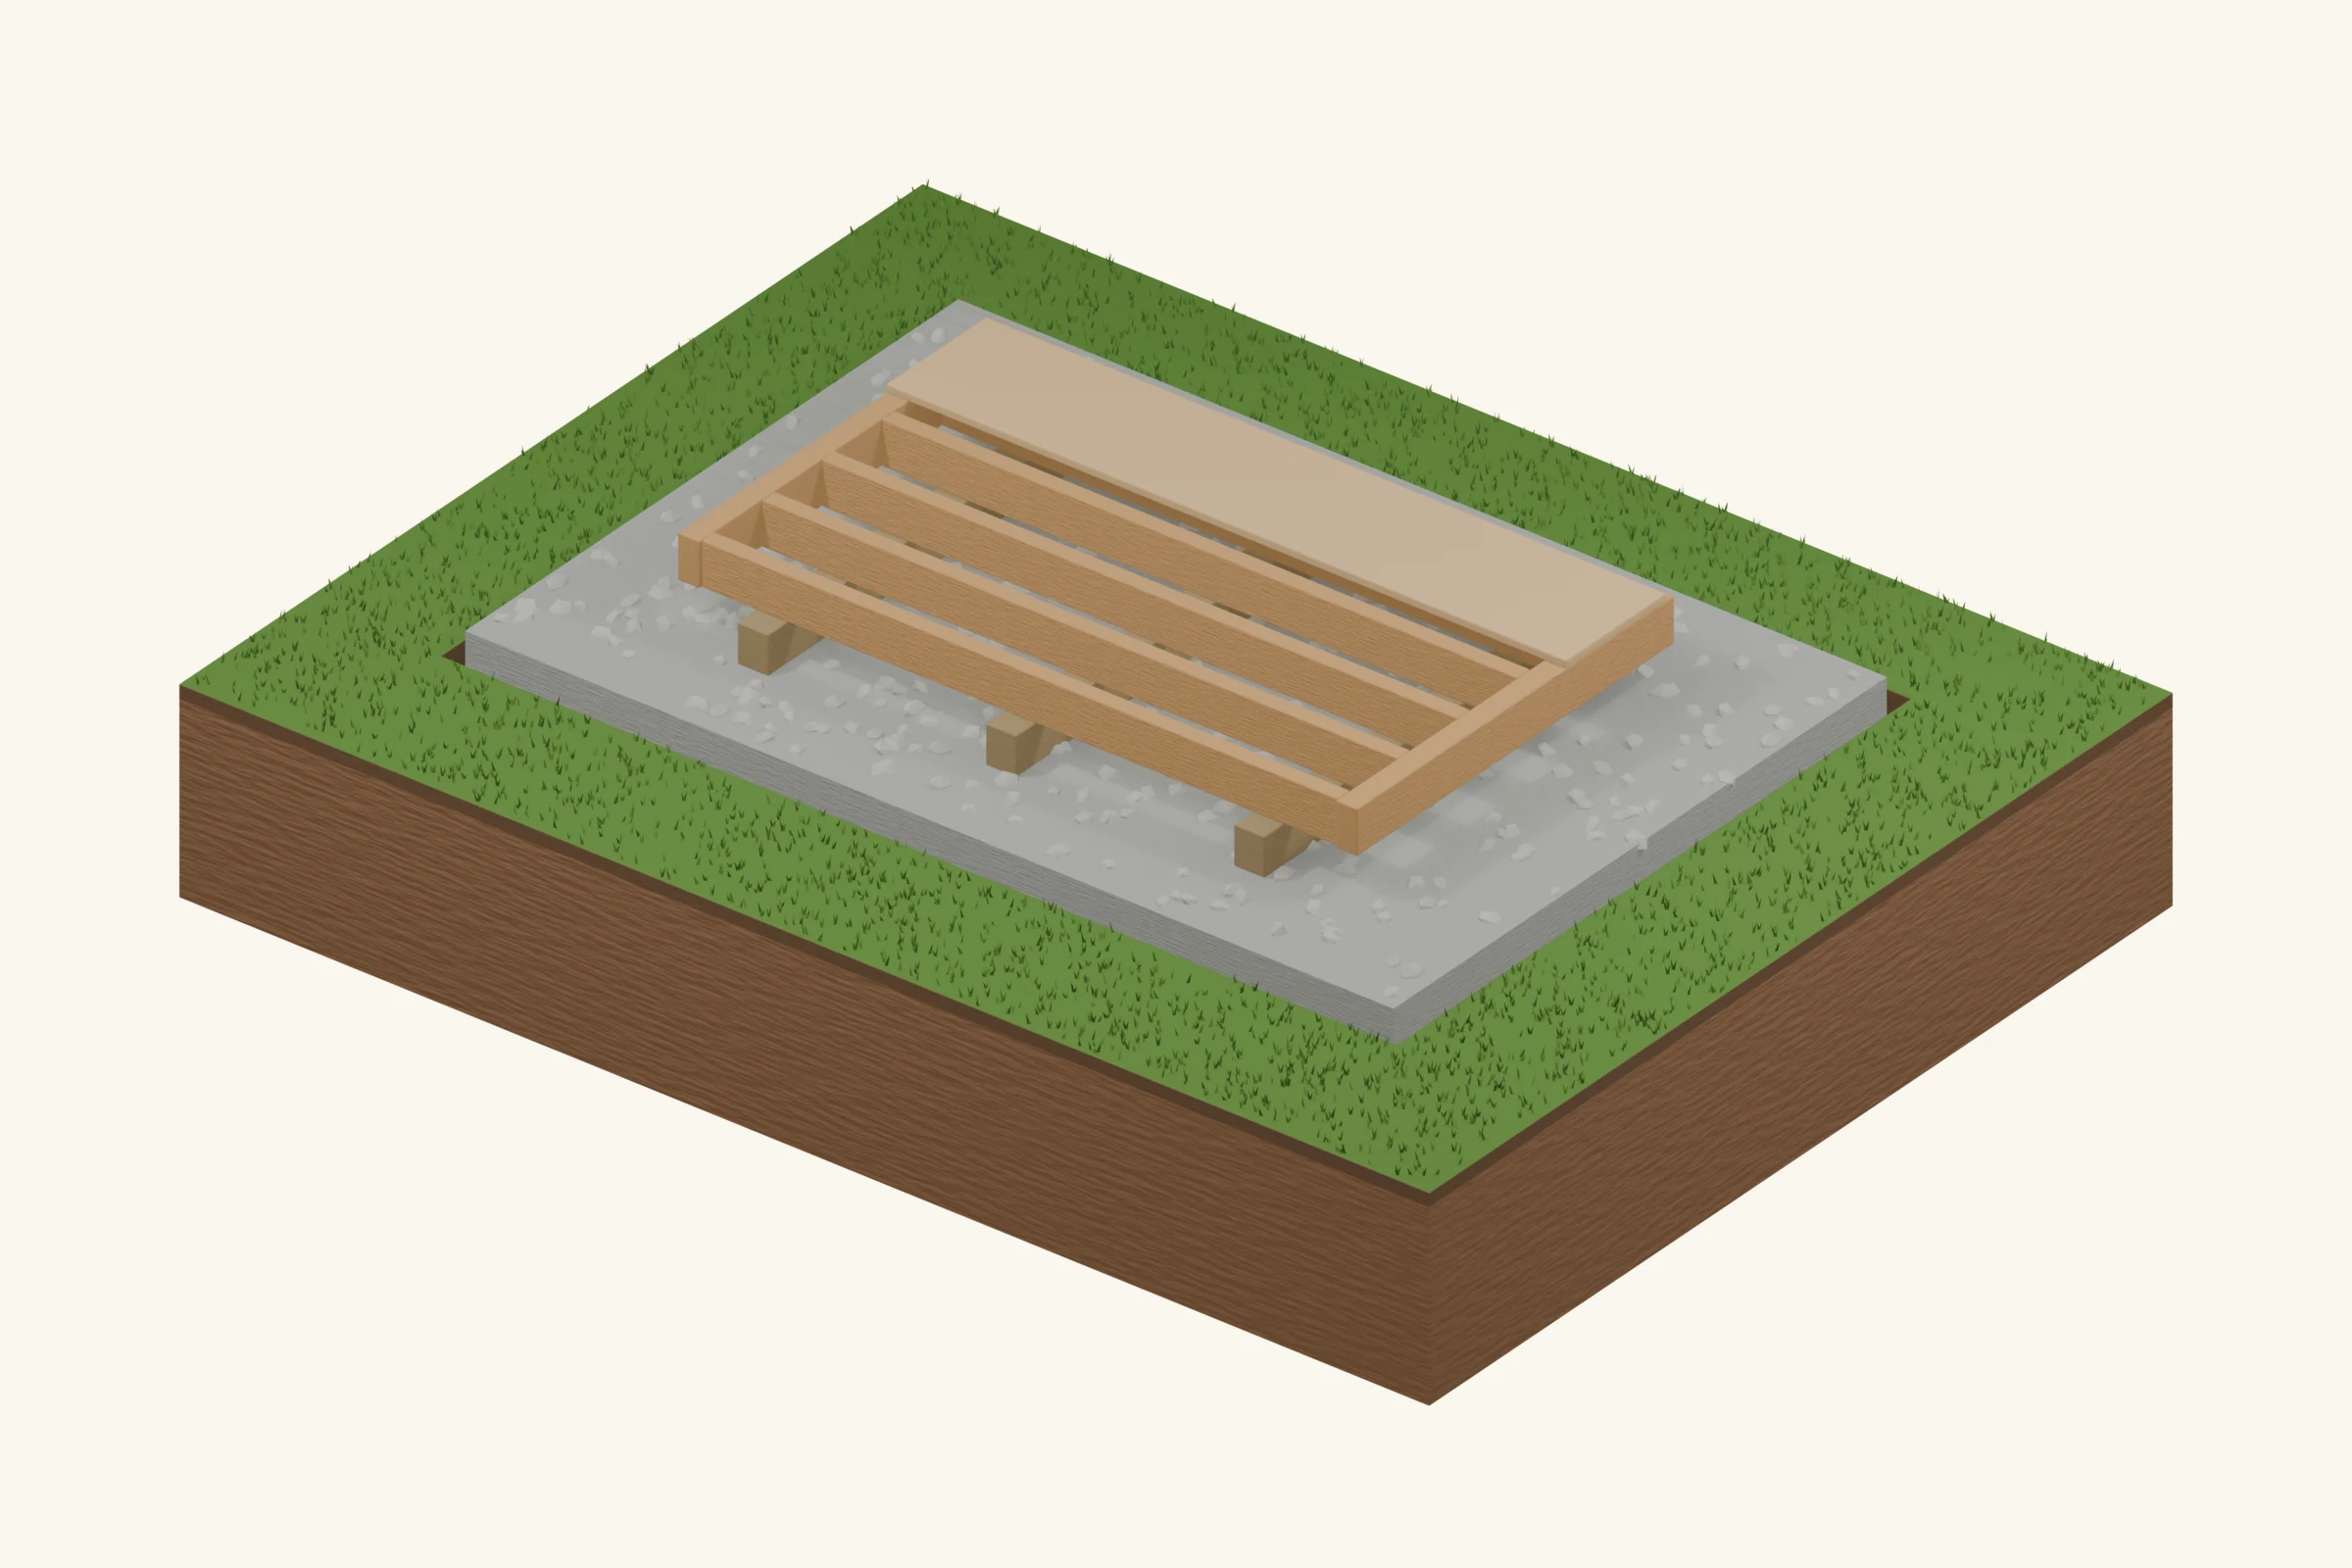
Skids are long timbers beneath the shed floor, usually running across several joists so the floor can transfer its load into them. They make a simple, recognizable assembly: soil, prepared pad, runners, floor. They are also common on delivered sheds, but a shed is only safely relocatable when the whole building and its connections are designed for lifting or moving.
Is it right for your shed?
Best fit: Storage sheds with a designed timber floor and enough space for a level pad.
Advantages
- Continuous runners suit many prefabricated shed floors.
- A gravel pad provides accessible support along each skid.
- No site concrete pour is necessary for the runner system.
Limitations
- Timber close to the ground needs appropriate treatment and drainage.
- Runner size and spacing affect floor performance.
- Separate anchoring and safe moving provisions are still needed.
What goes under it? The ground layers
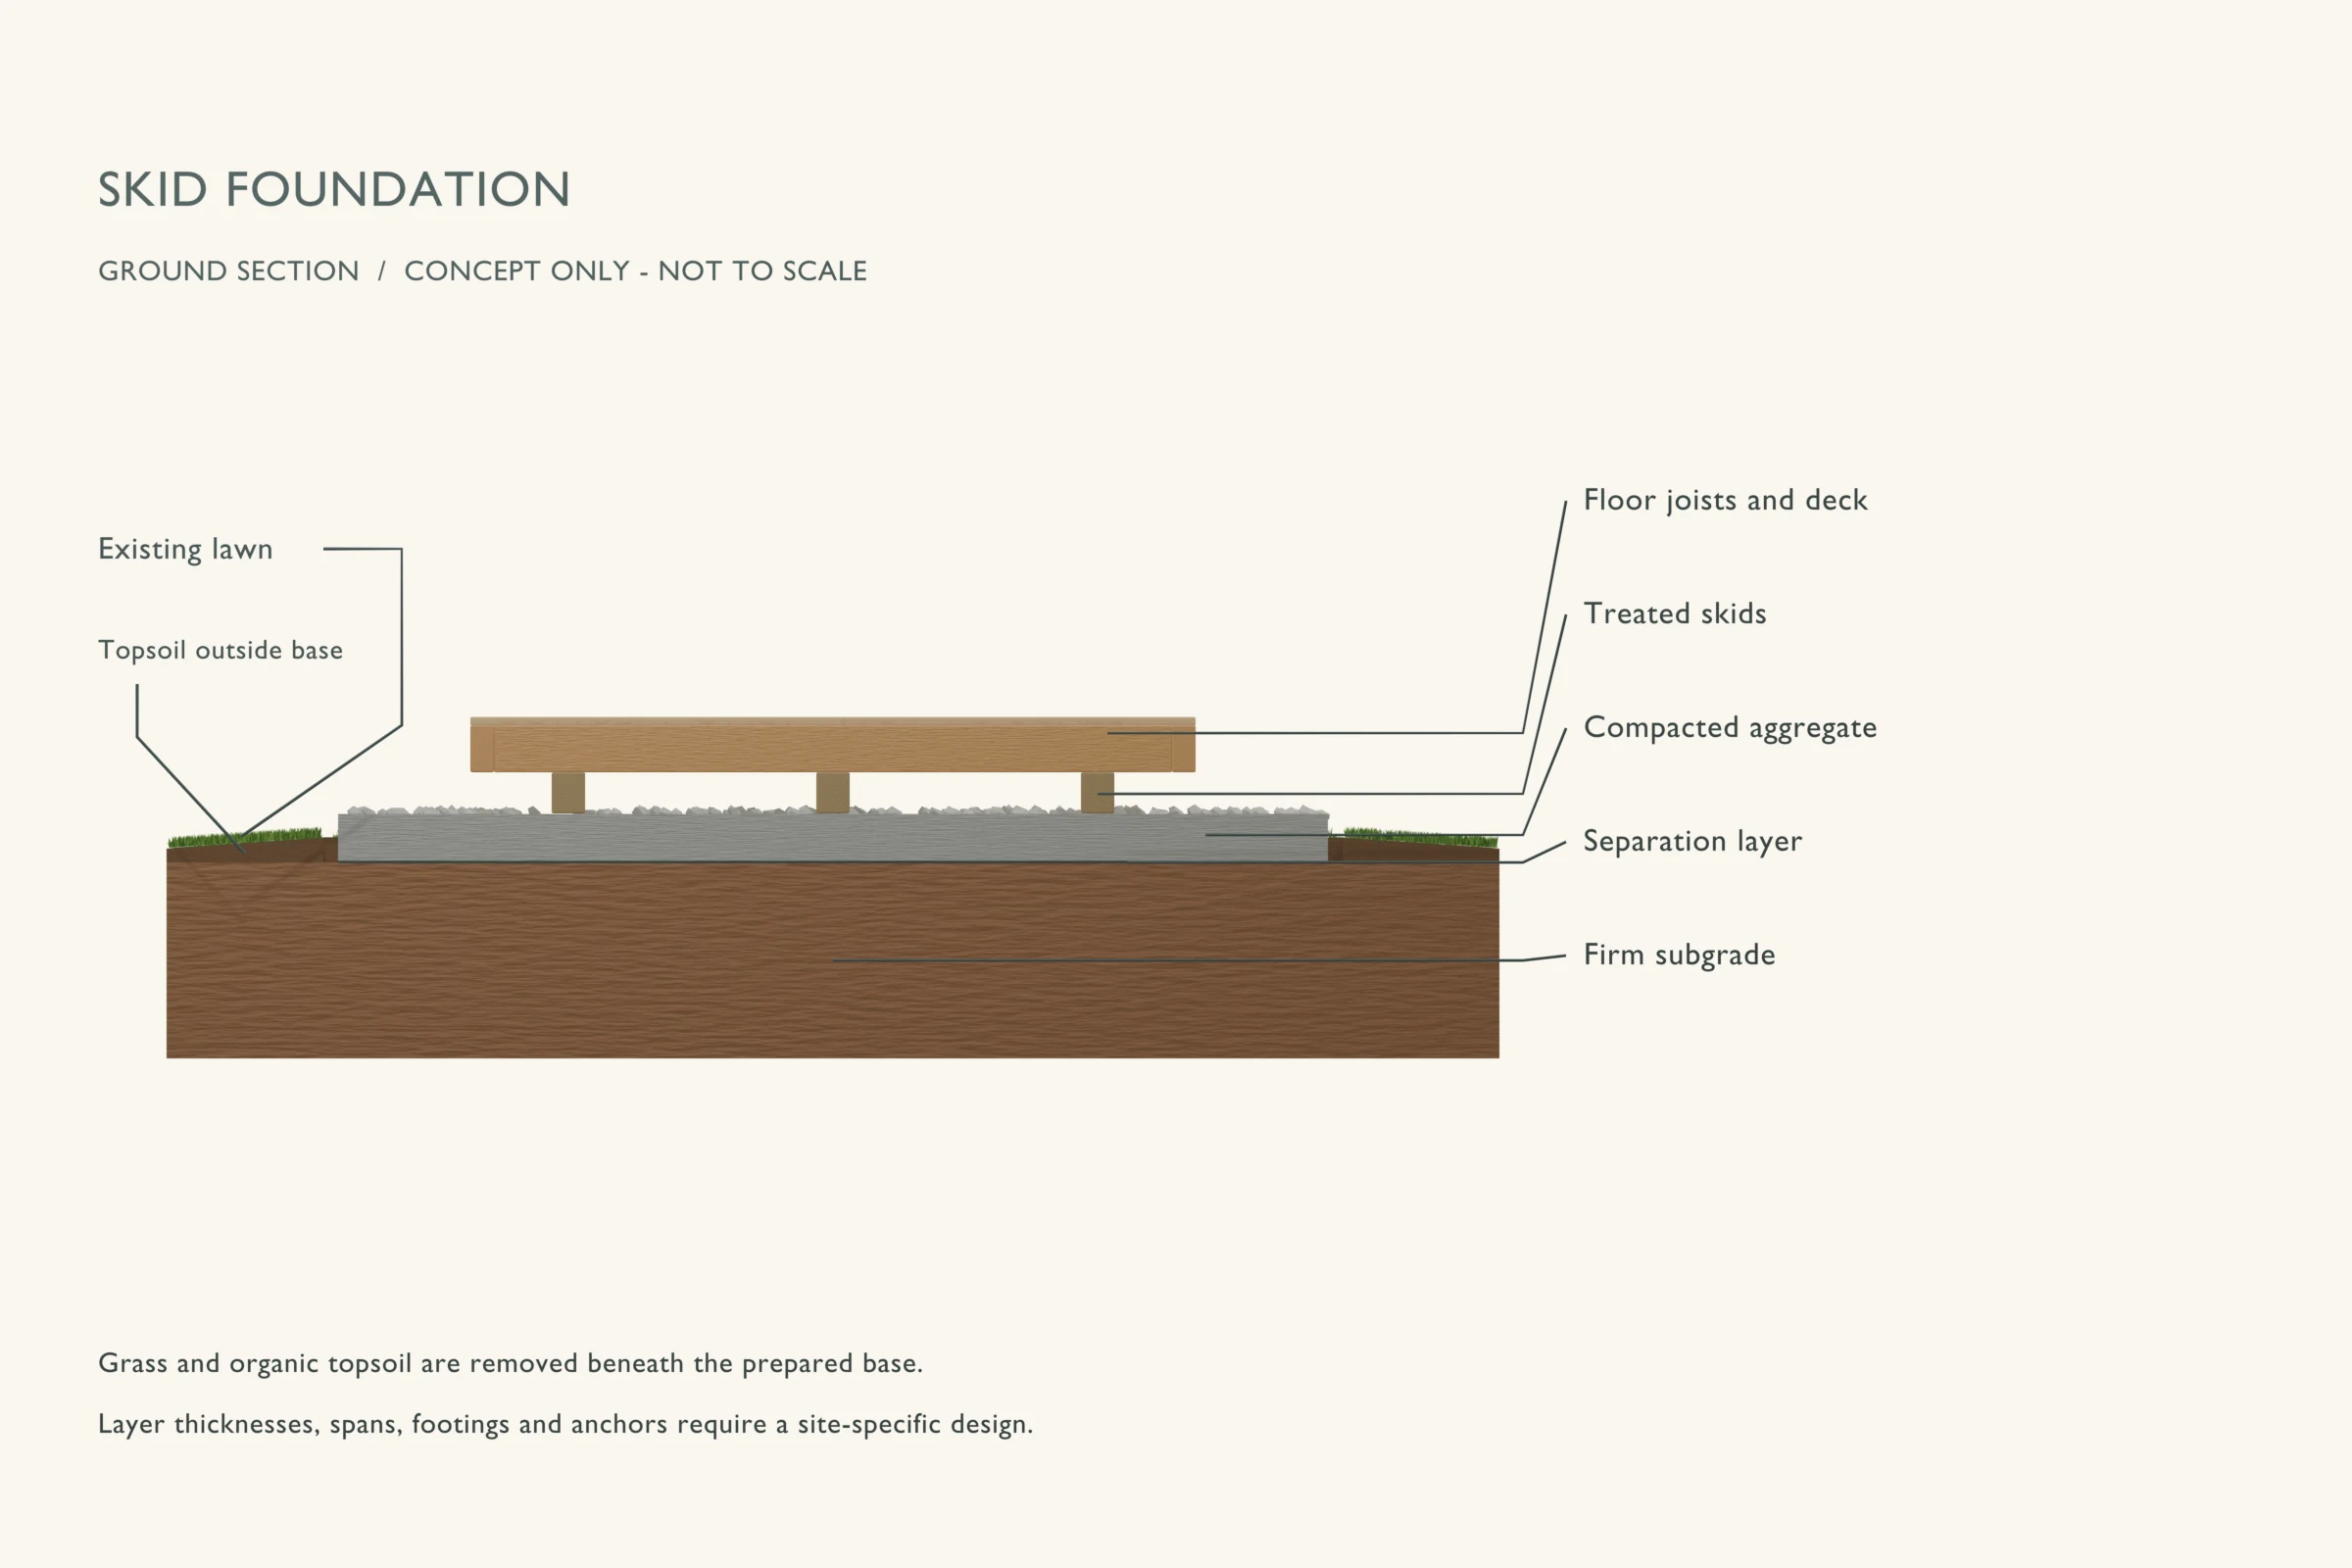
The explanation runs from the ground upward. Callout labels in the drawing identify the visible parts; some thin layers are enlarged for clarity.
- 1
Prepared subgrade
Remove organic material and address weak or wet ground.
- 2
Separation fabric
Use specified permeable fabric where soil and aggregate need separation.
- 3
Compacted gravel pad
Make a level bearing surface with an outlet for water and a margin beyond the runners.
- 4
Ground-contact runners
Place continuous skids on their intended bearing surface. Splices need a designed detail.
- 5
Joists and deck
Joists cross and connect to the runner system; the deck ties the floor together.
Materials and preparation
Use the quantities and specifications from your actual layout. Before ordering, resolve the pad footprint, support locations, finished floor height and the drainage route.
- Straight timbers with the specified treatment and structural grade
- Prepared aggregate pad and specified separation fabric
- Floor framing, rated connectors and the anchor system
Useful planning: choose the shed location and check permit requirements.
Build sequence
This sequence explains the order of work. Use it alongside the foundation design and the instructions for your chosen products.
Step 01
Coordinate the runners with the floor
Use the actual framing drawing to establish runner positions, cantilevers and connections. Do not assume three runners or a particular timber size fits every shed.
Step 02
Build and verify the pad
Check level along every proposed runner line, not just at the perimeter. A runner can appear level while bridging a hollow that changes it from continuously supported timber into a spanning beam.
Step 03
Select and place the timber
Check treatment end tags, grade, straightness and condition. Use treatment intended for the exposure; field-treat cuts and drilled holes as directed by the preservative supplier.
Step 04
Square and fasten the floor
Position the joists and rim members, check equal diagonals and fasten the floor system to the skids using its designed connection schedule. Do not notch a runner to correct a pad error.
Step 05
Complete anchorage and access
Install site-appropriate anchors and keep them accessible for inspection. Plan ramp support independently so a moving ramp does not lever against the floor or block drainage.
Mistakes to avoid
- Using above-ground-only treated timber in ground-contact exposure.
- Joining two skid pieces without a supported splice detail.
- Assuming a heavy shed cannot lift or slide in wind.
Inspection and maintenance
Inspect runner contact, anchors and end grain each season. Clear vegetation from the pad and investigate persistent dampness. Before moving a shed, arrange a lifting and transport plan that accounts for weight, bracing and access.
When to choose a different base
A skid foundation is a good candidate when the floor and site are compatible. If the runners would bridge large unsupported distances or the site needs tall supports, compare a beam-and-pier system instead.
Common questions
Can skids sit directly on dirt?
The timber treatment alone does not create a firm, level, drained base. Prepare the ground and bearing surface required by the shed design.
Can I use laminated boards instead of a solid runner?
Only with a designed built-up member and fastening schedule for the exposure and loads. Nailing spare boards together is not an equivalent specification.
Technical references
Use the currently adopted local requirements and the exact product instructions for your build. These references explain the principles behind this guide.
- AWPA: treated wood guidance for homeowners
Use-category labels distinguish above-ground, ground-contact and more demanding exposures.
- ICC: 2024 IRC, Chapter 4 — Foundations
Model-code background for bearing and frost protection. Your adopted code and local amendments control.