
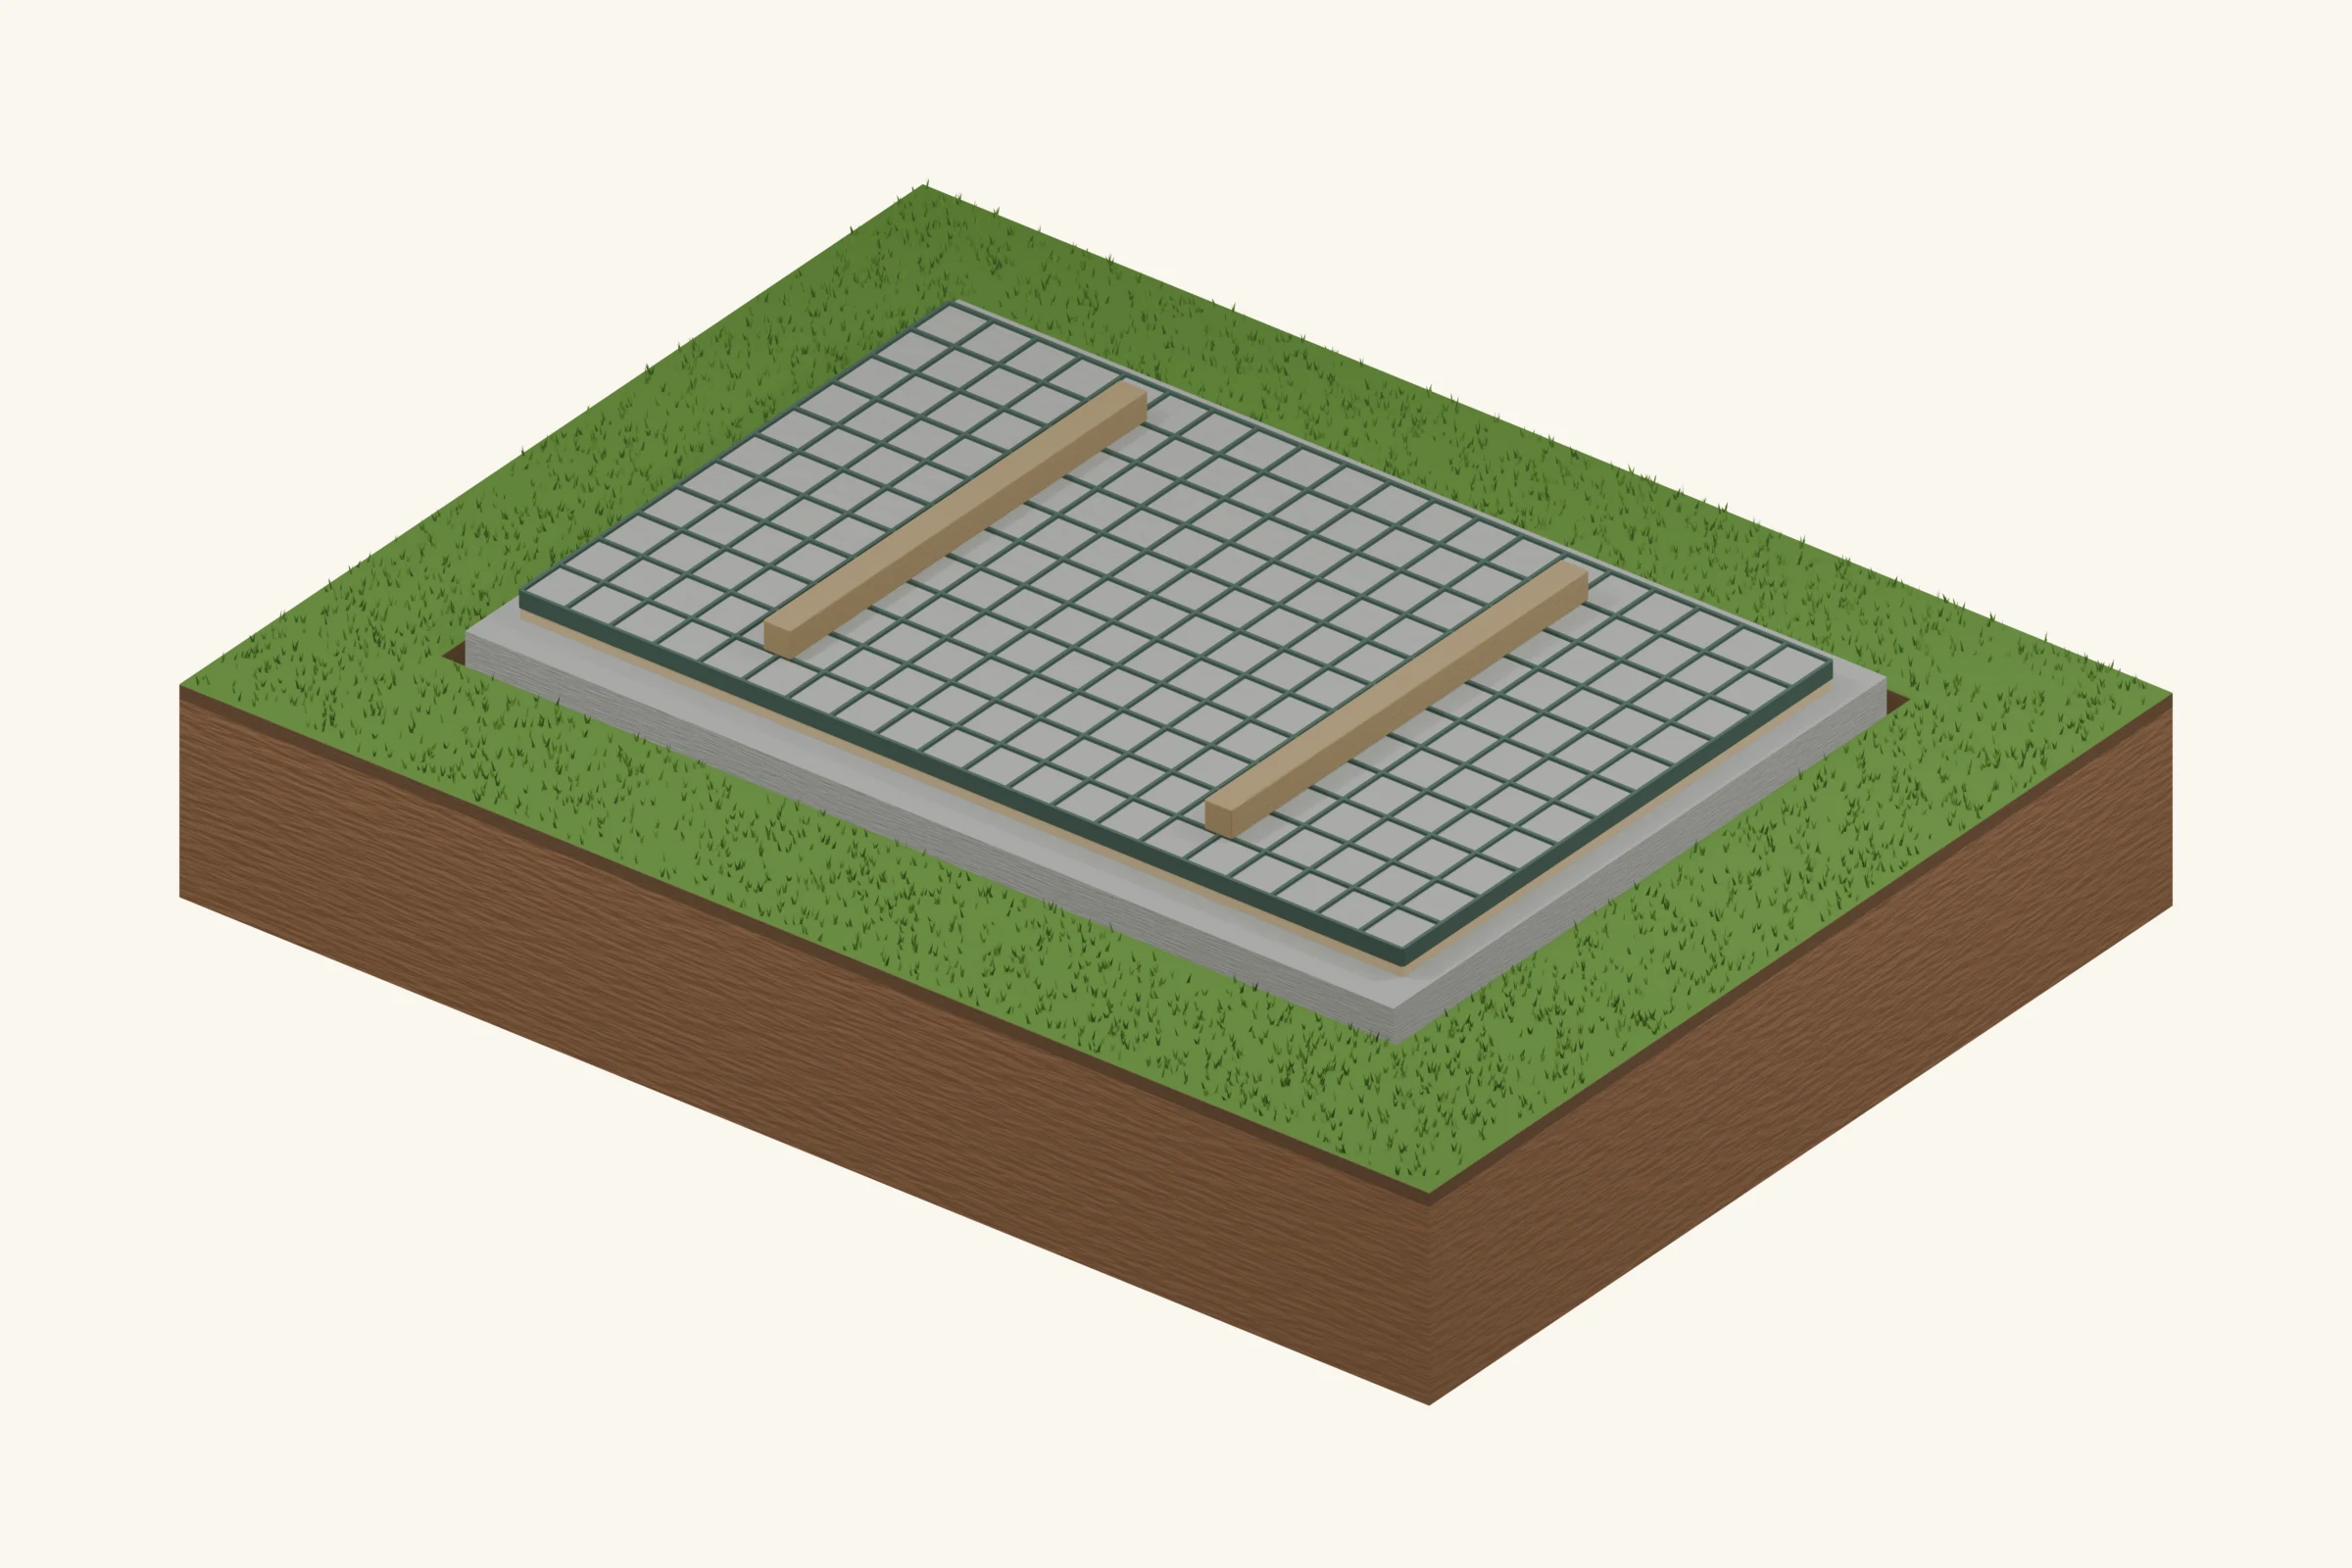
A grid system confines its specified infill and creates a modular surface for a compatible shed. The plastic does not make weak soil strong, eliminate preparation or anchor the shed. Products differ in cell shape, base preparation, infill and permitted support patterns, so the section is a general filled-grid concept rather than instructions for every brand.
Is it right for your shed?
Best fit: Light garden sheds approved for the selected ground-grid system.
Advantages
- Modules are light to handle and cut.
- A compatible aggregate-filled system can pass water through.
- The platform can be dismantled more readily than poured concrete.
Limitations
- Published grid strength is not a complete foundation capacity.
- Support rails and point loads must match the product limits.
- Drainage still depends on the underlying soil and outlet.
What goes under it? The ground layers
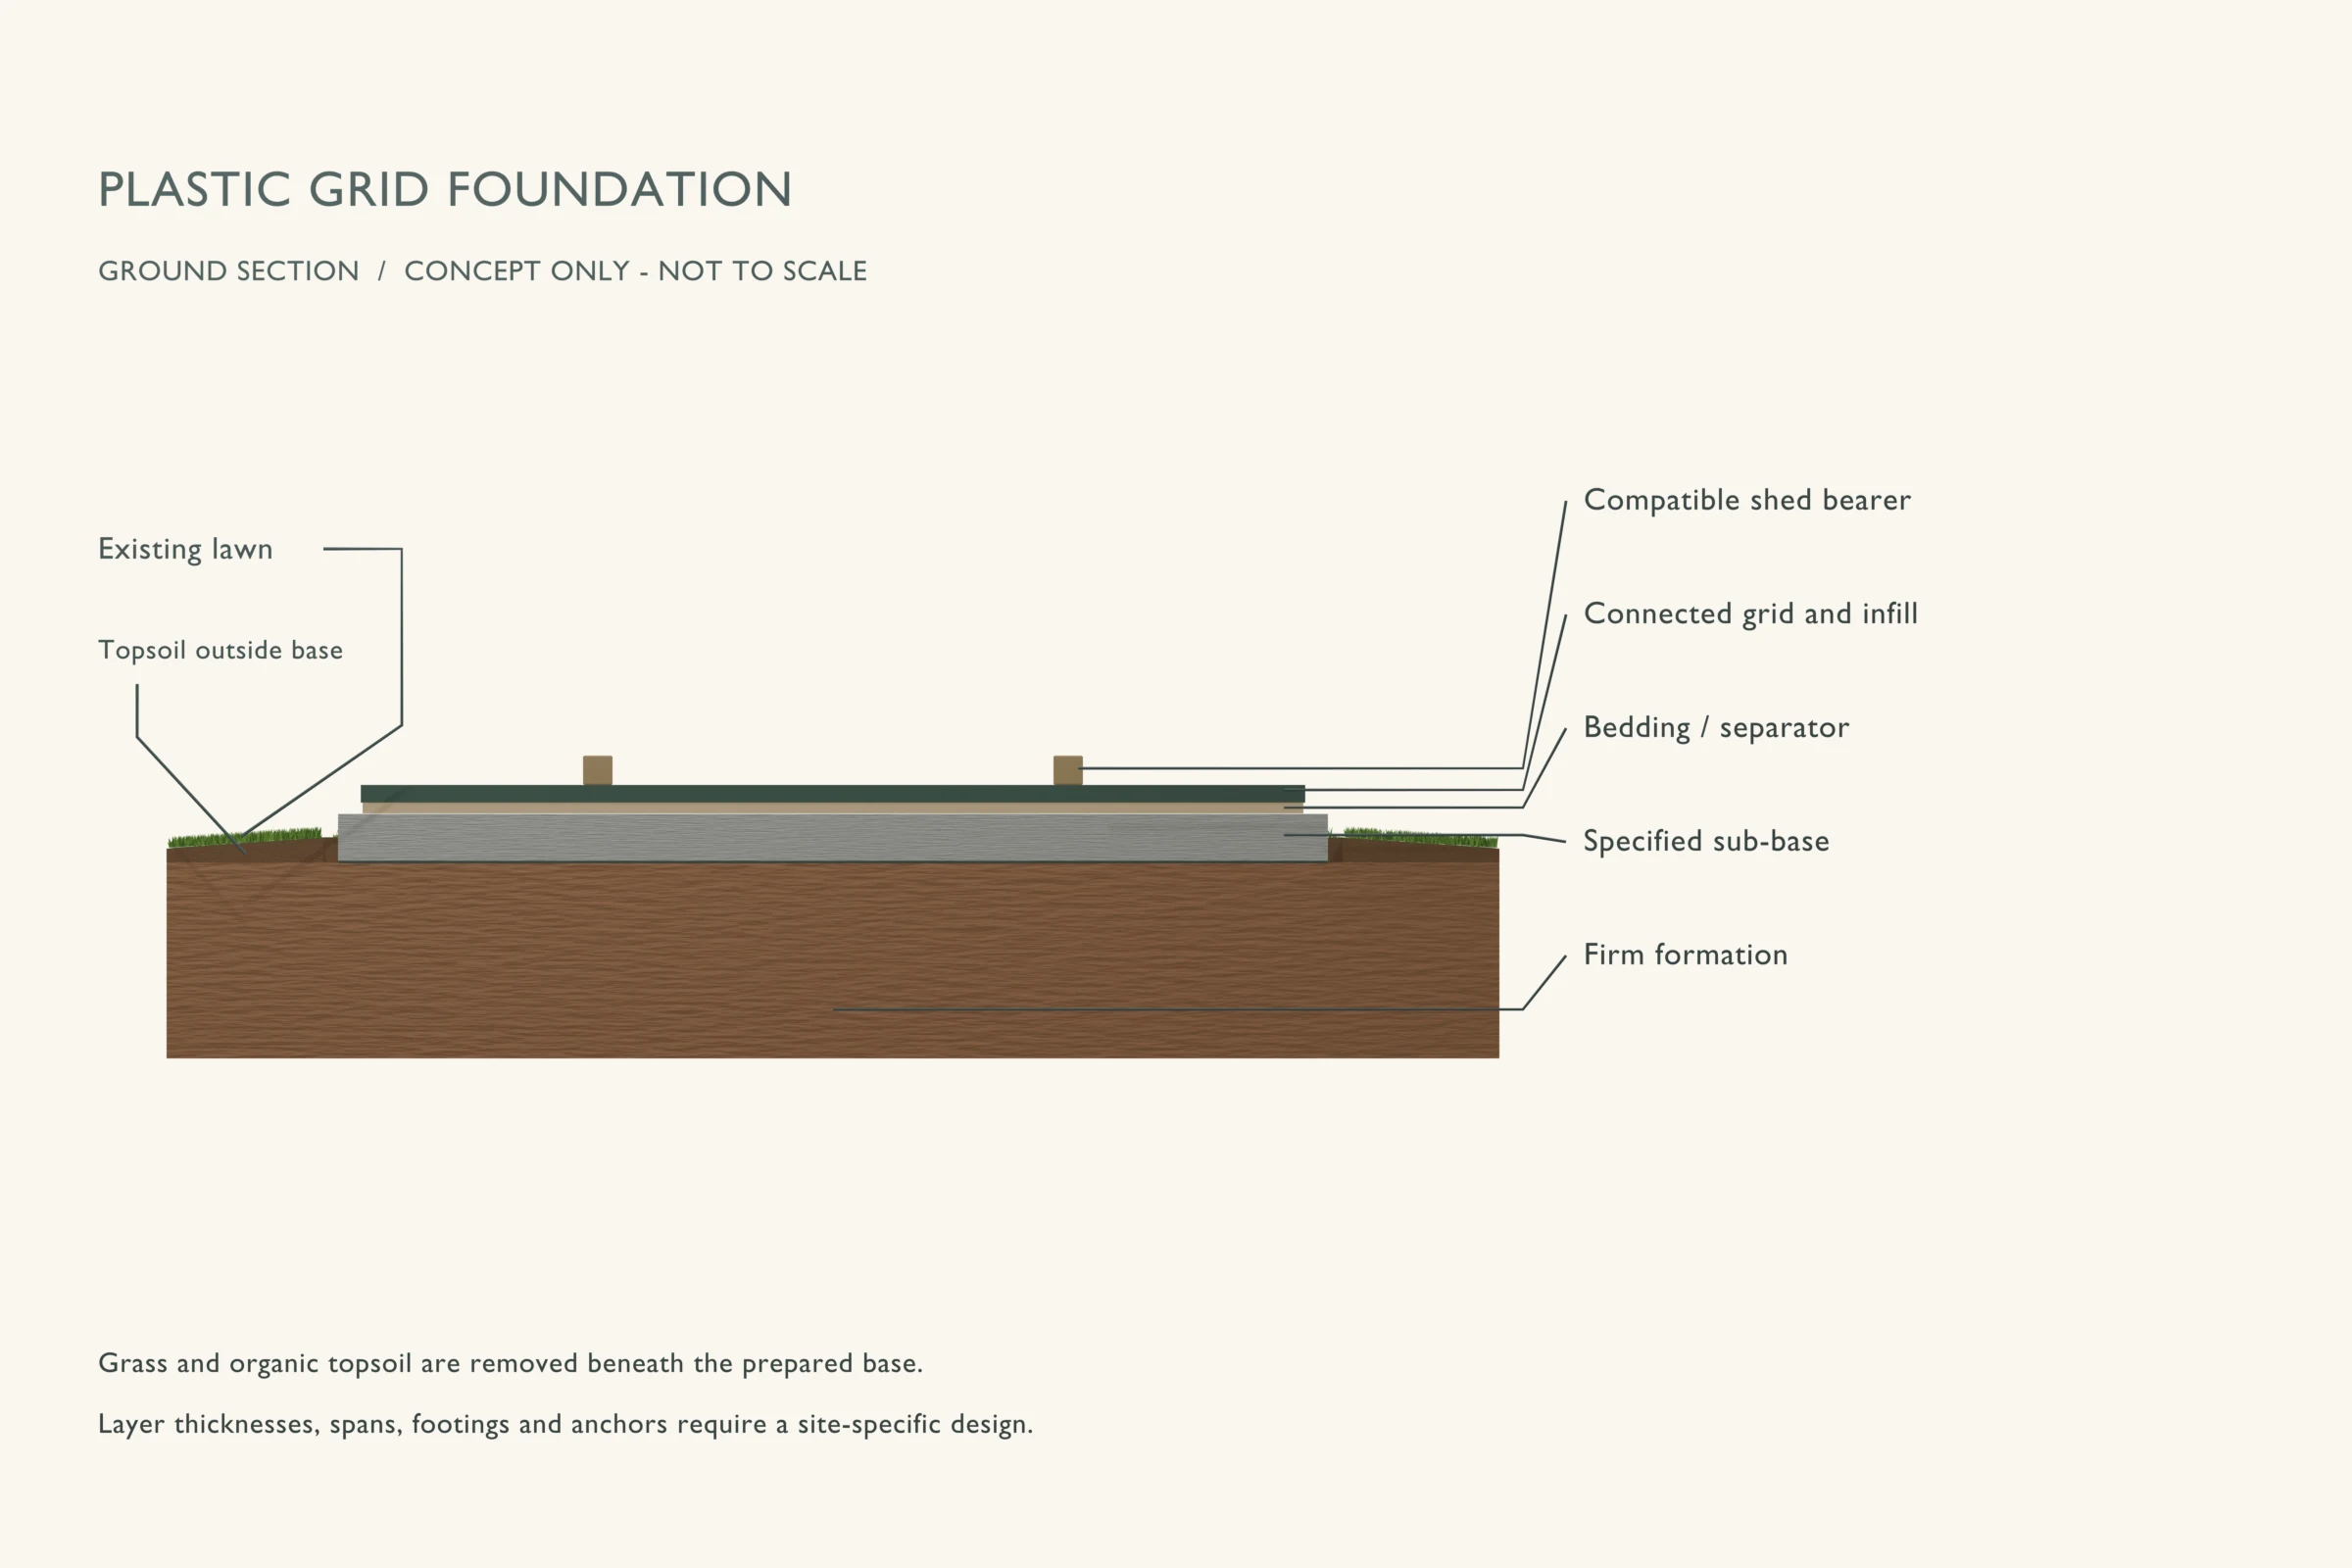
The explanation runs from the ground upward. Callout labels in the drawing identify the visible parts; some thin layers are enlarged for clarity.
- 1
Prepared ground
Remove organics and produce the firm formation required by the supplier.
- 2
Specified sub-base
Install the product-specific aggregate layer; do not assume all grids share the same detail.
- 3
Bedding or separator
Use only the layers and placement required by the chosen system.
- 4
Grid and infill
Connect modules and add the specified fill to the required level.
- 5
Compatible shed bearers
Check contact locations and keep the separate wind-anchor arrangement accessible.
Materials and preparation
Use the quantities and specifications from your actual layout. Before ordering, resolve the pad footprint, support locations, finished floor height and the drainage route.
- Shed-approved grid modules and specified connectors
- Manufacturer-specified sub-base, fabric and infill
- Cutting tools, level and preparation/compaction equipment
Useful planning: choose the shed location and check permit requirements.
Build sequence
This sequence explains the order of work. Use it alongside the foundation design and the instructions for your chosen products.
Step 01
Select the complete system
Confirm that the product is intended for your shed, including its base rail pattern and loaded weight. Marketing compressive strength of a test cell is not the allowable load on your prepared soil.
Step 02
Prepare the formation
Mark a level area with the required margin. Remove unsuitable material and install the specified base and separation layers. Keep an escape route for water rather than forming a lined bowl.
Step 03
Join and trim modules
Lay the grid in the supplier pattern and engage all connectors. Cut perimeter pieces without leaving unsupported slivers or sharp projections under the shed rails.
Step 04
Add the specified infill
Fill or leave cells open only as instructed for that product. Sweep excess away from contact faces so the floor or rails seat evenly.
Step 05
Seat and anchor the shed
Confirm all intended support lines touch the platform. Fit the separate anchor system without damaging grid connections or treating the plastic cells as anchor sockets.
Mistakes to avoid
- Laying modules over grass and expecting them to stay level.
- Substituting any available aggregate for specified infill.
- Calling a permeable grid a waterproof floor.
Inspection and maintenance
Check for settlement, broken cells and displaced infill at exposed edges. Clear leaves and sediment that obstruct drainage. Replace damaged modules using the supplier repair method after safely supporting the shed.
When to choose a different base
A grid can reduce handling weight for a compatible garden shed. Gravel with skids remains another option for a timber floor; a slab addresses a different need for a continuous structural floor.
Common questions
Does the plastic rot?
Plastic does not undergo timber decay, but it can be damaged, deform or degrade under conditions outside its product rating.
Does a grid replace a shed floor?
Usually it is a base below the kit floor or bearers. Use it as an exposed walking surface only when the chosen system and building design allow that use.
Technical references
Use the currently adopted local requirements and the exact product instructions for your build. These references explain the principles behind this guide.
- ProBase: manufacturer installation guide
An example of product-specific preparation. Other grid systems may require different aggregate or infill.
- ICC: 2024 IRC, Chapter 4 — Foundations
Model-code background for bearing and frost protection. Your adopted code and local amendments control.