
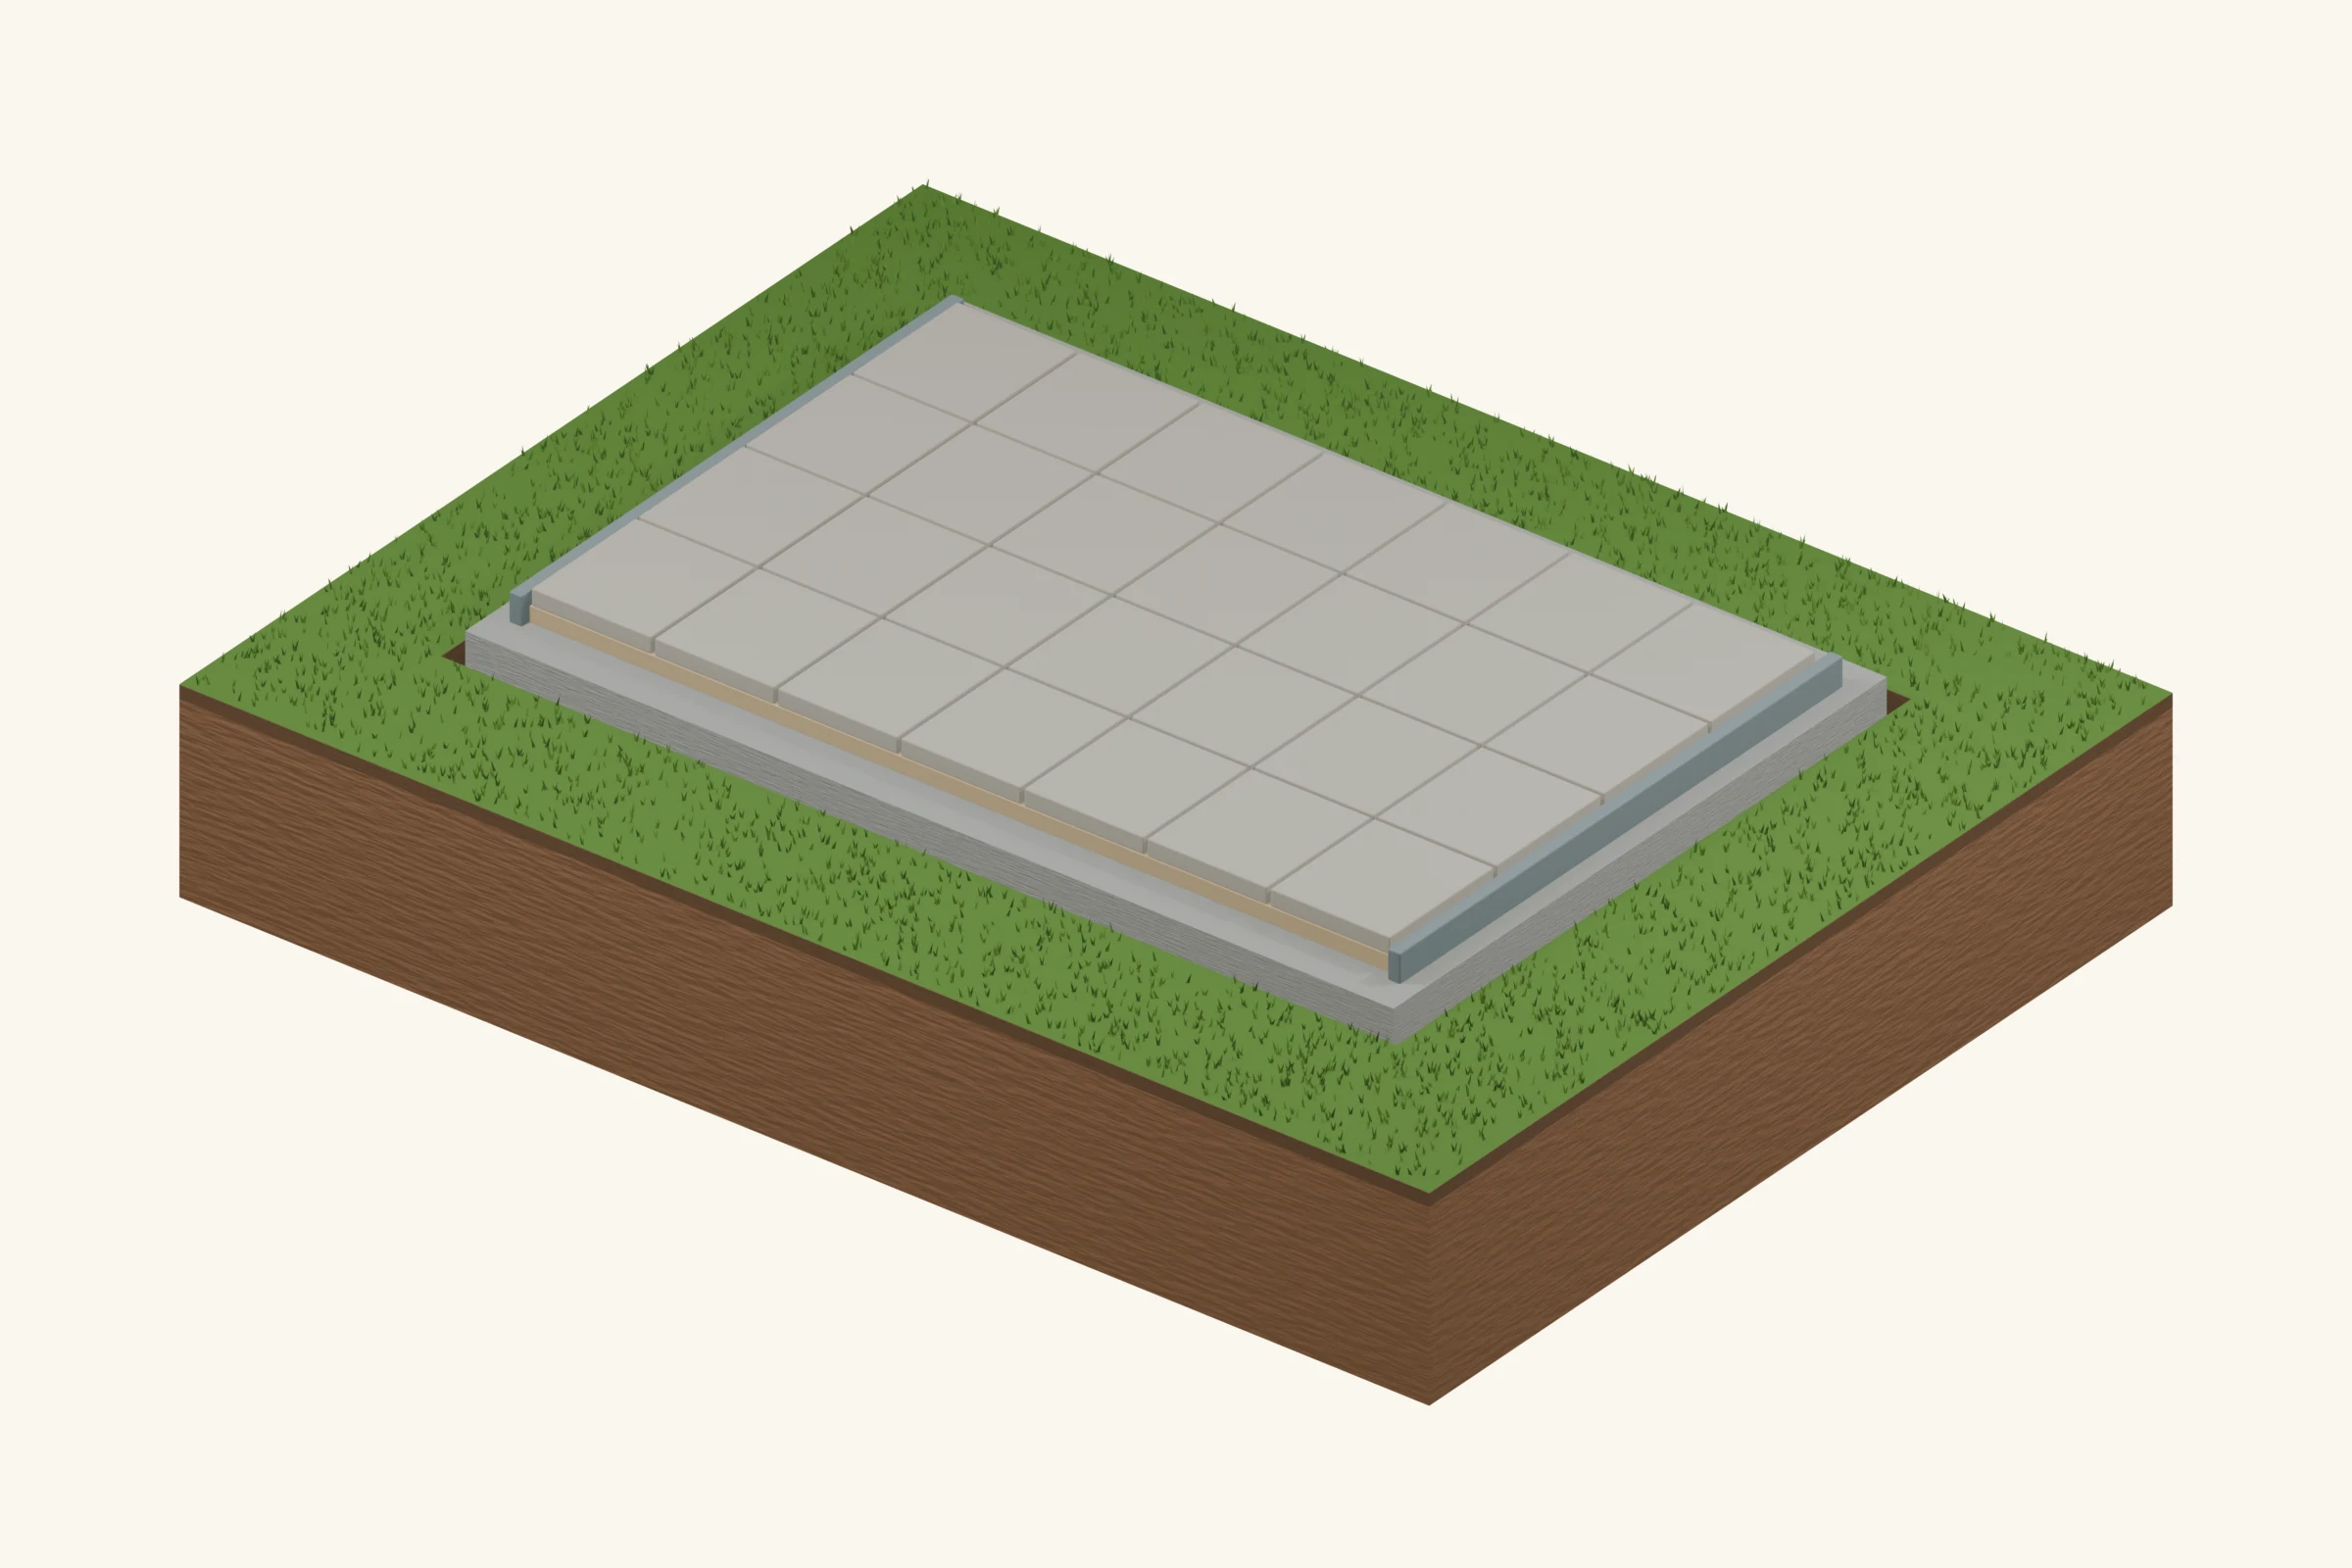
Paving can make a tidy base, especially for a small kit shed whose floor or base rails are intended to sit on a paved surface. The slabs or pavers are only the top of the assembly. Uniform subgrade, a compacted aggregate base, the correct bedding and edge restraint determine whether the surface stays even. Large paving slabs and small interlocking pavers may require different installation methods.
Is it right for your shed?
Best fit: Small sheds whose manufacturer accepts the chosen paved support surface.
Advantages
- Gives a clean surface around a small shed.
- Individual units can be lifted for repair.
- Works well with a coordinated perimeter and access path.
Limitations
- Point loads can crack unsuitable slabs.
- Unrestrained edges and poor bedding lead to movement.
- Joints do not create a watertight floor.
What goes under it? The ground layers
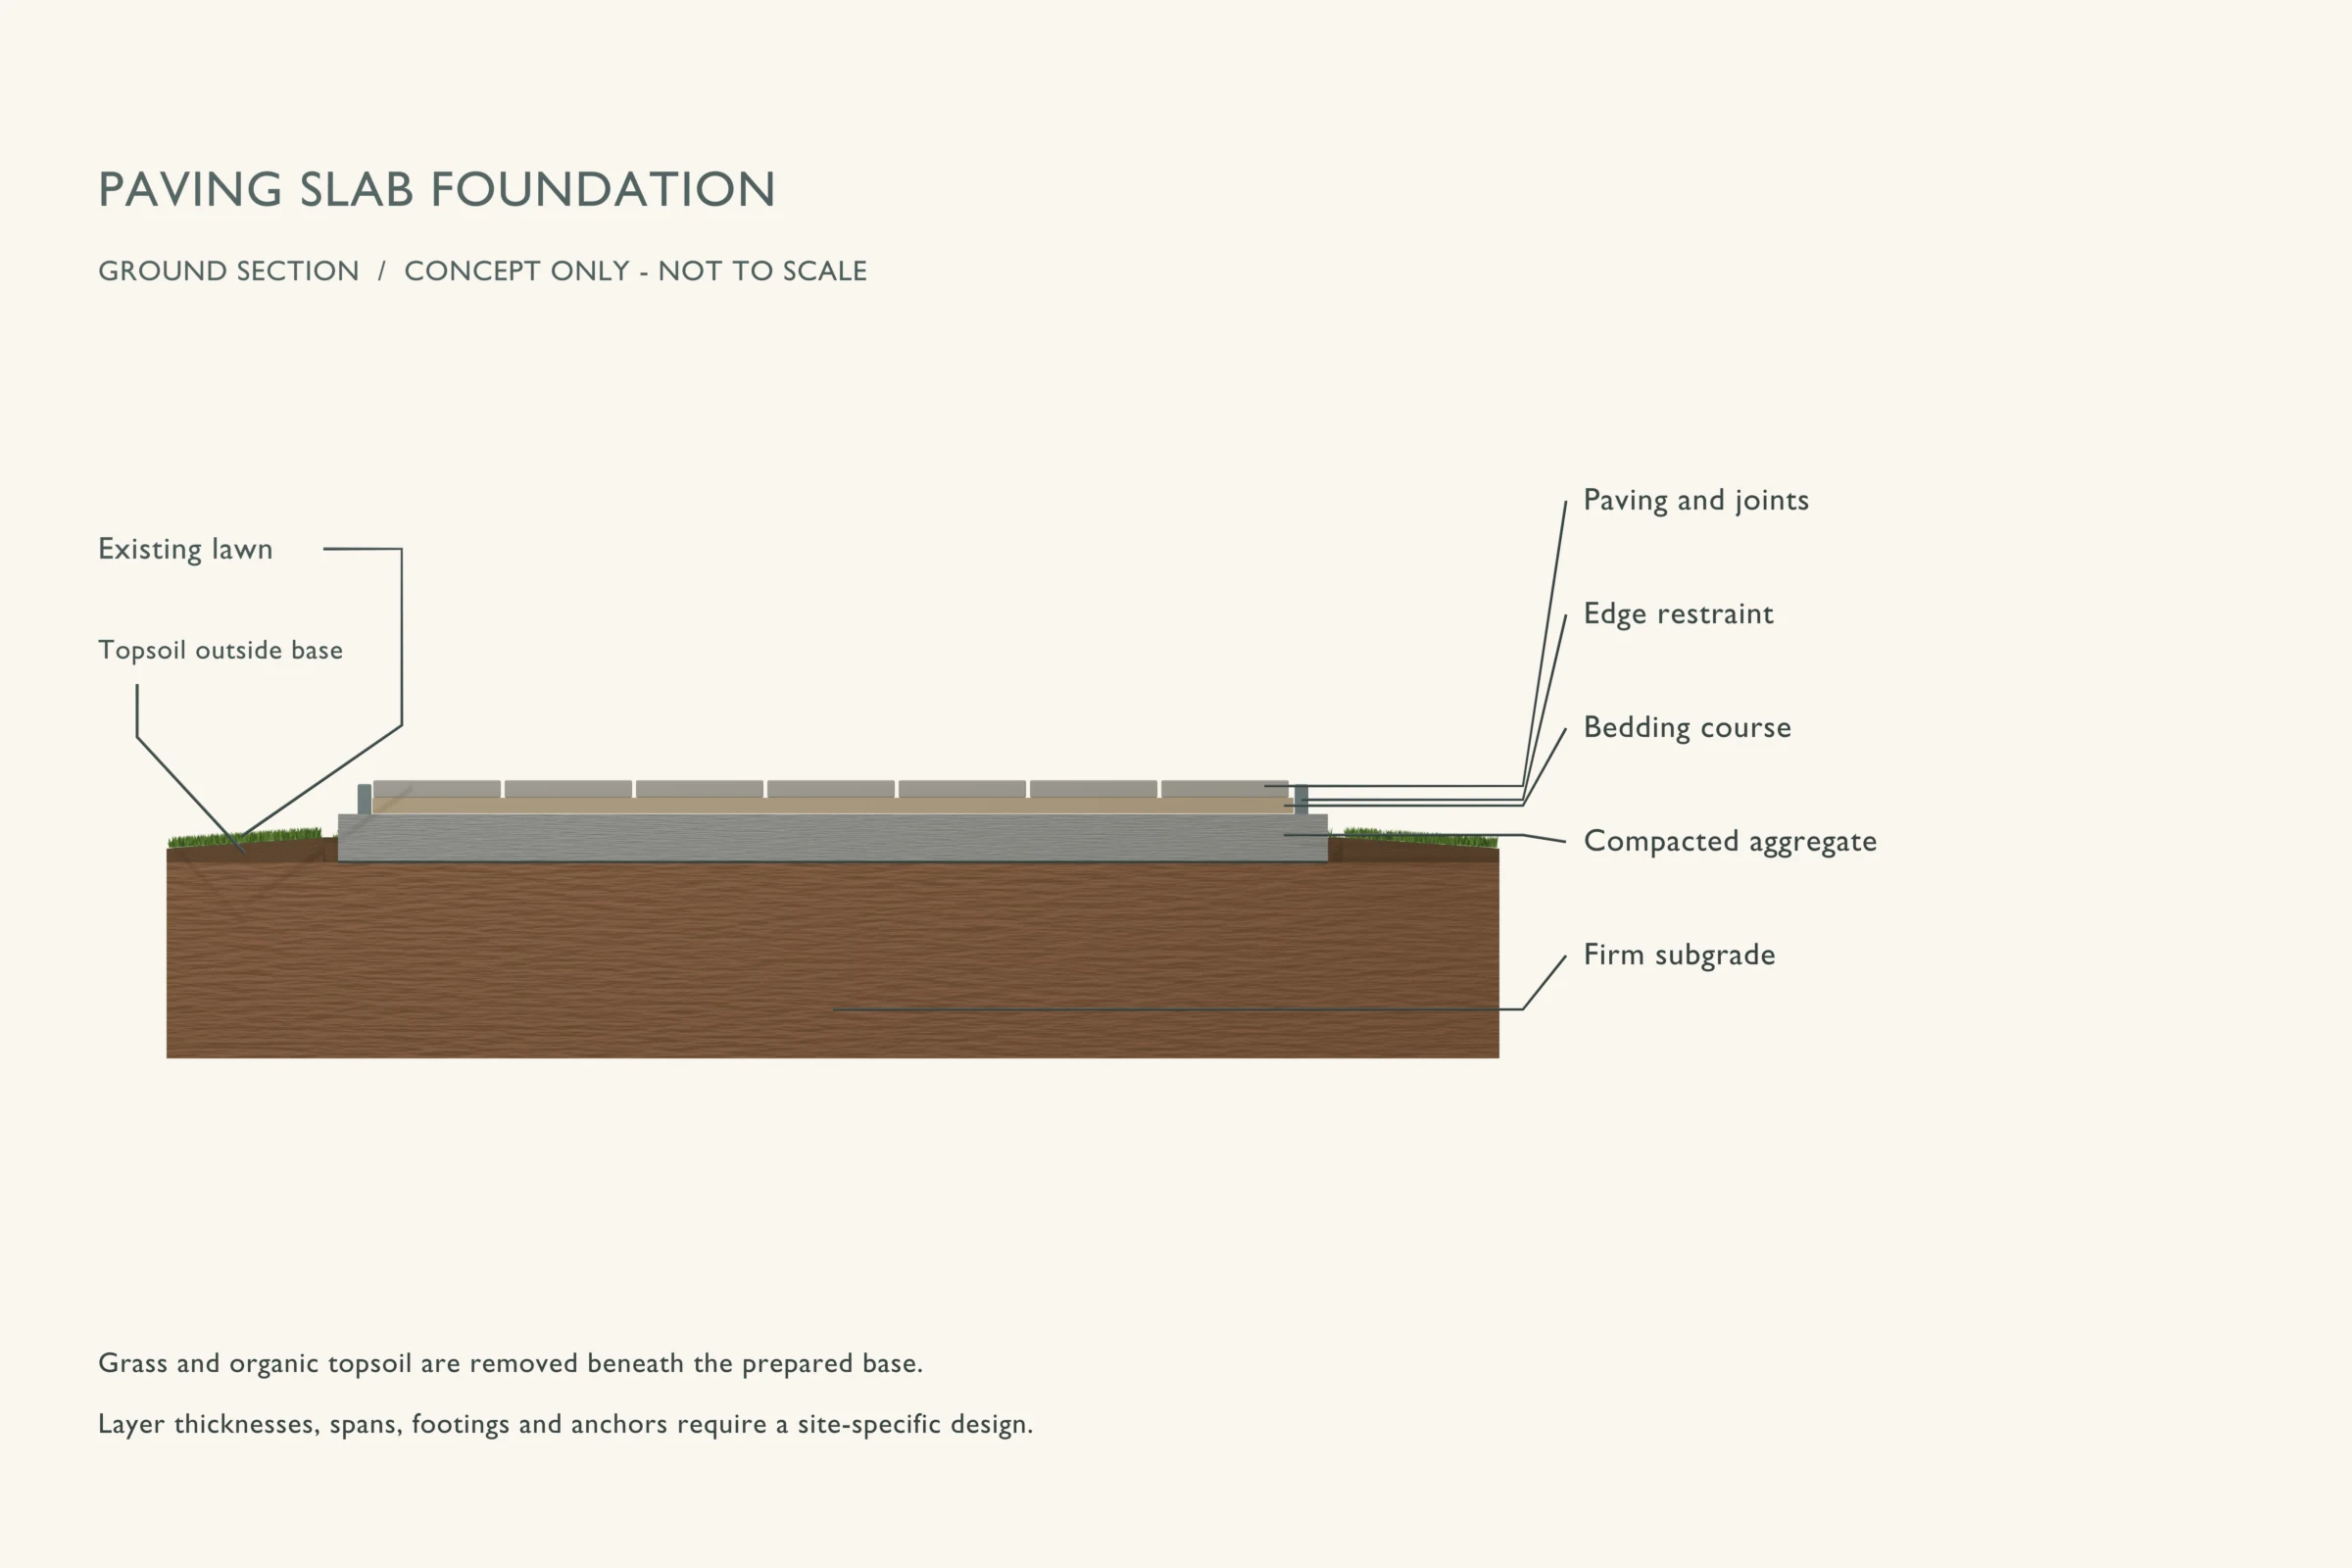
The explanation runs from the ground upward. Callout labels in the drawing identify the visible parts; some thin layers are enlarged for clarity.
- 1
Prepared subgrade
Provide uniform support after removing organic material.
- 2
Compacted aggregate base
Build the specified base thickness in controlled lifts.
- 3
Bedding course
Use the bedding specified for the paving system; do not use it to fill deep base depressions.
- 4
Paving units and joints
Lay supported units with the required joint treatment and edge restraint.
- 5
Shed base interface
Support the kit rails or bearers as instructed and provide an independent anchor detail.
Materials and preparation
Use the quantities and specifications from your actual layout. Before ordering, resolve the pad footprint, support locations, finished floor height and the drainage route.
- Load-appropriate paving units and matching bedding specification
- Compacted aggregate and edge restraints
- Screed tools, level, joint material and suitable compaction equipment
Useful planning: choose the shed location and check permit requirements.
Build sequence
This sequence explains the order of work. Use it alongside the foundation design and the instructions for your chosen products.
Step 01
Confirm shed and paving compatibility
Check whether the kit needs a continuous surface, perimeter support or bearers. Verify that the paving system can carry the resulting point or line loads.
Step 02
Set elevations and excavate
Coordinate door access and the outside runoff route. Keep the shed support surface within its level tolerance while directing surrounding water away from it.
Step 03
Build a consistent base
Compact the specified aggregate and correct unevenness before bedding. Soft spots below the base will show up later as rocking or sunken paving.
Step 04
Lay bedding, units and restraint
Follow the unit supplier instructions for the bedding type, depth, joints and any permitted compaction. Large slabs may crack under equipment intended for smaller pavers.
Step 05
Install and anchor the shed
Verify the final surface and support contact. Do not rely on thin individual pavers to resist wind-anchor pullout unless a tested system specifically permits it.
Mistakes to avoid
- Replacing the aggregate base with a thick sand bed.
- Leaving the outer units without edge restraint.
- Drilling shed anchors into paving without a capacity detail.
Inspection and maintenance
Watch for rocking slabs, open joints and ponding. Lift and repair a failed area from the base upward. Keep weeds and debris out of joints using methods compatible with the paving product.
When to choose a different base
Paving suits a compatible small kit and a tidy surface. For heavy workshop equipment, a structurally designed slab offers a different load-carrying floor and should be evaluated separately.
Common questions
Can any patio support a shed?
No. Confirm its condition, level, base construction and capacity for the shed support points before reusing it.
Is paving suitable for a car?
Some pavement systems are designed for vehicles, but this shed-base concept makes no vehicle-load claim. Unit, base and subgrade design all matter.
Technical references
Use the currently adopted local requirements and the exact product instructions for your build. These references explain the principles behind this guide.
- CMHA: Construction of Interlocking Concrete Pavements
Subgrade, compacted base, bedding and edge restraint for a conventional paver system.
- ICC: 2024 IRC, Chapter 4 — Foundations
Model-code background for bearing and frost protection. Your adopted code and local amendments control.