To frame a shed roof, pick a roof style and a pitch, then cut and set the rafters. Choose a style — gable, lean-to, gambrel, saltbox or hip — and a pitch (usually 3/12 to 6/12). Cut each rafter with a plumb cut at the ridge and a birdsmouth that seats on the top plate, leaving a tail for the overhang. Set the rafters 16 or 24 inches on center against a ridge board, tie the rafter feet together so the walls can't spread, then sheathe with 1/2" plywood, add felt underlayment and roofing. Wider spans or snow loads call for deeper lumber (2x6 or 2x8) or ground-built trusses lifted into place.
The roof is where most first-time shed builders slow down — it's the stage with angled cuts and work off a ladder. But every shed roof comes down to the same handful of decisions: a roof shape, a pitch, a choice between rafters and trusses, and a set of standard cuts that repeat for every rafter. Get those right and the cutting is repetitive, not difficult. This guide walks through each one.
The roof lands on the walls, so build those square and tied together first. Our shed wall framing guide covers plates, studs and the double top plate the rafters bear on, and this roof stage is one part of the full how to build a shed sequence.
Quick answer: pick a roof style
If you just want the short decision: for almost every shed, frame a gable roof at a 4/12 pitch with rafters. It sheds water and light snow, it's the easiest shape to lay out and vent, and the cuts are simple. Reach for the other styles only when you have a specific reason:
- Lean-to (skillion): the simplest roof — one slope. Best against a wall or fence, or for a first build.
- Gambrel (barn): choose it when you want standing-height loft storage overhead; build it as trusses.
- Saltbox: an off-center ridge giving one long slope — a tall front, lower back, extra depth.
- Hip: slopes on all four sides — the best wind resistance and a finished look, but the most cutting.
Everything below is the detail behind that: the five styles compared, how pitch works and how to choose it, rafters versus trusses, the cuts that make a rafter, the build sequence, and the snow- and wind-load basics.
Roof styles compared
There are five shed roof shapes worth knowing. The gable and lean-to cover the great majority of DIY sheds; the others solve specific problems.
| Style | Shape | Best for |
|---|---|---|
| Gable | Two slopes meeting at a central ridge — the classic peaked roof. | Most sheds. Simple, sheds water and snow well, easy to vent. |
| Lean-to (skillion) | A single flat plane sloping from a tall wall to a short one. | The simplest roof. Sheds against a wall or fence, and first builds. |
| Gambrel (barn) | Two slopes per side — shallow up top, steep on the sides. | Maximum loft/storage headroom; usually built as trusses. |
| Saltbox | An asymmetric gable — one short slope and one long slope off an off-center ridge. | A tall front wall with a lower back; extra depth without a full second slope. |
| Hip | Slopes on all four sides meeting at a ridge or point — no gable ends. | Wind resistance and a finished all-round look; the most cutting. |
Gable
The classic two-sided peak: a ridge down the center with matching rafter slopes falling to each eave wall. It's the most common shed roof for good reason — it sheds water and snow well, the triangular gable ends are easy to vent, and the framing is the simplest to lay out because every common rafter is identical. It's the best place to start and what most of our plans use.
Lean-to (skillion / mono-pitch)
The simplest roof of all: a single flat plane sloping from a tall wall down to a shorter one. There's no ridge board — the rafters run continuously from the high wall to the low wall, seated on the top plates (or a ledger where the shed leans on a house wall). Because a single slope has no opposing rafters, there's no outward thrust and no need for rafter ties. It's ideal for a shed tucked against a fence, garage or house, and it's the easiest roof for a first-timer to get right.
Gambrel (barn)
The barn shape has two slopes per side — shallow across the top, steep down the sides — which buys a large amount of usable loft space under the roof. Gambrel roofs are almost always built as trusses on the ground, with plywood gussets at each "knuckle" where the slope changes angle, then lifted into place. There are more cuts and more angles than a gable, but the payoff is standing-height storage overhead.
Saltbox
A saltbox is an asymmetric gable: the ridge sits off-center, so one side has a short slope and the other a long one. It's framed like a gable — a ridge board with rafters on each side — but the two rafter runs are different lengths. The look pairs a tall front wall with a lower back wall, which adds interior depth on the long side and gives a distinctive profile. It sheds snow and water off the long slope well.
Hip
A hip roof slopes on all four sides, meeting at a ridge (or a single point on a square shed) with no vertical gable ends. That all-round slope makes it the most wind-resistant shape and gives a tidy, finished look, but it's the most work to frame: alongside common rafters you cut angled hip rafters at the corners and shorter jack rafters that run from the wall up to the hips. It's rarely necessary on a small shed, but worth considering in high-wind areas or where appearance matters.
How roof pitch works
Pitch is the slope of the roof, written as rise over run: inches of vertical rise for every 12 inches of horizontal run. A 4/12 roof climbs 4 inches for every 12 inches it runs; a 12/12 roof rises 12 in 12 — a 45-degree slope. The bigger the first number, the steeper the roof. You dial the pitch in on a framing square (or a speed square) and use it to mark the plumb cut, the birdsmouth and the rafter length, so getting the pitch right up front is what makes every rafter cut line up.
For sheds, most builds land between 3/12 and 6/12:
| Pitch | Feel | Best for |
|---|---|---|
| 2/12–3/12 | Low, modern | Lean-to roofs, mild climates, windy sites |
| 4/12 | Balanced all-rounder | Most sheds — sheds water and light snow |
| 6/12+ | Steep, traditional | Snow country, extra loft headroom |
Low vs steep — the trade-offs. A steeper roof sheds rain and snow faster, gives more interior height (and a bigger loft on a gambrel), and lasts longer because water runs off quickly — but it uses more lumber and roofing, and is harder and less safe to work on. A lower roof is cheaper, easier to build, and catches less wind, but it holds water and snow longer and needs roofing rated for a low slope.
Choosing your pitch: in heavy-snow regions go steeper (6/12 or more) so snow slides off rather than piling up; on exposed, windy sites keep it lower to reduce uplift; and always check the minimum slope your roofing is rated for — most asphalt shingles want at least 2/12 to 4/12, while standing-seam metal can go lower. When in doubt, a 4/12 gable is the safe default.
Rafters vs trusses
You have two ways to frame the roof. Stick-framed rafters are individual boards cut and raised one at a time against a central ridge board. They give the most open headroom inside the shed and are the simplest approach for a small gable or lean-to roof. Trusses are triangular assemblies built on the ground from 2x4s joined with plywood gusset plates, then lifted up and set in place as complete units. Trusses install fast, come out identical every time, and span farther without interior support — which is why they suit wider sheds and gambrel barns with a loft.
- Rafters: maximum headroom, easy for small gable and lean-to roofs, cut and set in place one pair at a time.
- Trusses: fast and repeatable, span farther, built and squared safely on the ground, then lifted up.
- Either way, the pitch, spacing and lumber-size decisions still apply — a truss is just rafters and ties pre-assembled.
Spacing and lumber size. Space rafters or trusses 16 or 24 inches on center and line them up over the wall studs so loads carry straight down. For lumber, 2x4 handles short spans and light loads, 2x6 is the workhorse for typical 8–12 ft shed spans and leaves room for insulation, and 2x8 covers longer spans or heavy snow. Span depends on lumber species, spacing and load, so confirm your choice against a rafter span table and your local code before you cut.
Roof anatomy & the rafter cuts
Learn the parts of a roof once and every rafter reads the same:
- Ridge board — the board on edge along the peak that every rafter pair lands against; make it at least as deep as the rafter's plumb cut.
- Common rafter — a full-length sloping board running from the ridge to the wall; on a gable, all commons are identical.
- Plumb cut — the vertical cut at the top of the rafter that sits flat against the ridge board.
- Birdsmouth — the notch near the lower end (a horizontal seat cut plus a vertical heel cut) that seats the rafter on the top plate.
- Rafter tail — the part of the rafter past the wall that forms the overhang.
- Overhang, fascia & soffit — the tails carry the eave past the wall; fascia closes the tail ends and the soffit boards the underside.
- Rafter ties & collar ties — horizontal members that stop the walls spreading (ties low) and the ridge separating (collars high).
The three cuts that make a rafter. The plumb cut at the top sits vertical against the ridge board. The birdsmouth partway down has a seat cut (horizontal, sits on the plate) and a plumb heel cut (vertical, against the plate's outer edge); cut the seat no deeper than about one-third of the rafter's depth so you don't weaken it. Past the wall, the rafter tail runs out to form the overhang and gets a plumb (or square) tail cut for the fascia. Mark and cut one rafter carefully, test-fit it in place, then use it as a template for the rest so every rafter is identical.
Ties keep the roof honest. Rafter ties low on the rafters (near the top plate) resist the outward thrust that would otherwise spread the walls, and collar ties in the upper third stiffen the roof against wind uplift. On a gable roof, don't skip them — a spread wall is far harder to fix after the fact than to prevent. A lean-to roof has a single slope with no opposing thrust, so it needs no ties; a truss has its ties built into the webbing.
Build the roof: raising a gable step by step
With square walls tied together by a double top plate, the gable-roof sequence is:
- 1Confirm the walls are square, plumb and tied together with double top plates.
- 2Mark rafter and ridge layout on the plates at 16" or 24" on center, matching both sides.
- 3Cut one common rafter — plumb cut, birdsmouth, tail — test-fit it, then template the rest.
- 4Set the ridge board to length and prop it at the correct height at both ends.
- 5Install the two end rafter pairs first, then fill in the rest against the ridge.
- 6Add rafter ties near the plate and collar ties in the upper third.
- 7Frame the gable-end studs and any overhang framing (lookouts) for the rake.
- 8Sheathe with 1/2" plywood, breaking sheets over rafters with staggered seams.
- 9Add drip edge and felt underlayment, then shingles or metal roofing, and cap the ridge.
Sheathing and felt. Nail 1/2" plywood or OSB across the rafters so sheets break on a rafter at their edges and the seams stagger row to row — that's what stiffens the roof plane. Run metal drip edge along the eaves, roll out felt (building paper) underlayment lapping bottom-up like shingles, then install your roofing. In snow country add a self-adhesive ice-and-water membrane along the eaves. A lean-to roof follows the same steps minus the ridge: the rafters simply run high wall to low wall. A gambrel swaps common rafters for trusses lifted into place.
Work with a helper when raising rafters or trusses, keep a ladder or scaffold on stable ground, and don't skip the ties. Once the roof is sheathed and dried in, the rest of the build — siding, doors, finishing — is covered in the full how to build a shed guide.
Snow & wind loads
A roof has to carry more than its own weight. Two loads drive how you size and brace it, and both are local — the numbers come from your jurisdiction's building code, not a rule of thumb.
Snow load is the weight of accumulated snow, measured in pounds per square foot for your area. Where it's high, you respond three ways: a steeper pitch (6/12 or more) so snow slides off instead of building up; deeper rafters (2x6 or 2x8) or tighter spacing (16" on center) so the framing carries the weight; and solid rafter ties so the load doesn't spread the walls. A rafter span table for your snow load tells you the lumber size and spacing you need.
Wind load pushes on the walls and lifts the roof (uplift). Here a lower pitch catches less wind, and the key is the connections: hurricane ties or metal framing anchors tying each rafter or truss down to the wall top, collar ties to hold the ridge, and well-nailed sheathing to keep the roof plane from peeling. In high-wind areas a hip roof — sloped on all four sides — sheds wind better than a gable with its flat end walls.
Roof framing checklist
Run through this before you sheathe and roof:
- Walls are square, plumb, and tied together with a double top plate before any rafter goes up.
- Roof style and pitch chosen; pitch checked against the minimum slope your roofing is rated for.
- One rafter cut and test-fit — clean plumb cut, birdsmouth no deeper than a third, correct tail — then templated for the rest.
- Rafter/truss spacing (16" or 24" OC) matches the wall studs; lumber size confirmed against a span table for your load.
- Ridge board set to length and height; end rafter pairs set first, the rest filled in against it.
- Rafter ties near the plate and collar ties in the upper third installed (gable/saltbox); trusses have ties built in.
- Overhang, fascia and (vented) soffit framed; gable/rake overhang supported.
- Rafters/trusses tied down to the walls with hurricane ties or anchors where wind or code requires.
- Sheathing breaks on rafters with staggered seams; drip edge, felt underlayment (and eave membrane in snow country) before roofing.
With the roof framed, sheathed and dried in, you're over the hardest part of the build. Siding, doors, windows and finishing come next — the full how to build a shed guide picks up from here.
Shed plans with the roof already worked out
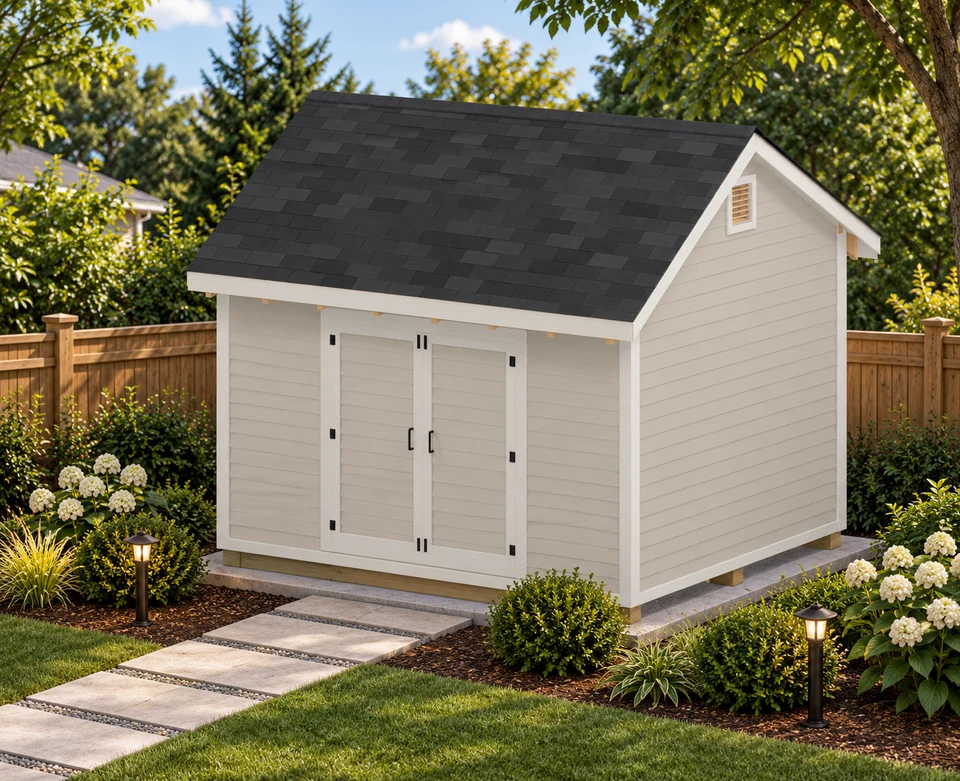
Compare a gable storage shed with a single-slope design. Open the free PDFs to inspect the roof geometry, drawings and included schedules. Confirm connection details, local loads and any unresolved dimensions before using a design for construction.
Frequently asked questions
What is the best roof pitch for a shed?
For most sheds a pitch between 3/12 and 6/12 works well. A 4/12 pitch is a common all-rounder: steep enough to shed water and light snow, shallow enough to keep rafter cuts and material use reasonable. In heavy-snow regions go steeper (6/12 or more) so snow slides off instead of piling up; on exposed, windy sites a lower pitch reduces uplift. A lean-to roof can go as low as about 2/12 or 3/12 as long as your roofing is rated for that slope.
How do you read a roof pitch like 4/12?
Pitch is written as rise over run: the first number is how many inches the roof rises vertically for every 12 inches it runs horizontally. So a 4/12 roof climbs 4 inches for each 12 inches of horizontal distance, and a 12/12 roof rises 12 inches per 12 — a 45-degree slope. The bigger the first number, the steeper the roof. You set the pitch on your framing square and use it to lay out every rafter cut.
How far apart should shed rafters be?
Space rafters 16 or 24 inches on center (measured center-to-center). 24 inches on center uses less lumber and is fine for a small shed with light roofing; 16 inches on center is stronger and preferred for wider spans, heavier roofing, or snow loads. Match the rafter spacing to your wall stud spacing so the loads stack straight down through the studs to the floor.
Should I build rafters or roof trusses for my shed?
Stick-framed rafters give you the most headroom and are simple for a small gable or lean-to roof. Trusses — built on the ground from 2x4s and plywood gusset plates, then lifted into place — are faster to install, come out identical every time, and span farther without interior support. They are the usual choice for wider sheds and for gambrel barn roofs where you want standing-height loft space.
What is a birdsmouth cut and how deep should it be?
A birdsmouth is the notch cut near the lower end of a rafter so it seats flat on the wall's top plate. It has two faces: a horizontal seat cut that sits on the plate and a vertical plumb (heel) cut against the plate's outer edge. Keep the seat cut no deeper than about one-third of the rafter's depth so you don't weaken it — the rest of the rafter must carry past the notch to form the overhang.
Do shed rafters need collar ties or rafter ties?
Most gable roofs need at least rafter ties. A rafter tie low on the rafters (near the top plate) resists the outward thrust that would otherwise push the walls apart under load. A collar tie sits higher, in the upper third, and helps keep the ridge from separating under wind uplift. Lean-to roofs don't need them because a single slope has no outward thrust; trussed roofs have this bracing built into the truss webbing.